
The best car polish for swirl marks is the one that matches your paint condition, your tool choice, and how much correction you actually need, not whatever claims “one-step miracle” on the label.
Swirls are frustrating because they’re most obvious in the exact moments you want your car to look perfect: direct sun, gas station lights, photos after a wash. And the annoying part is you can “wash more” and still make them worse if the wash process is the real culprit.
This guide breaks down what swirls really are, how to pick a polish by cut level and finish, and a practical routine you can follow at home. You’ll also see a quick comparison table, plus a checklist to help you avoid buying a compound when you only needed a finishing polish.
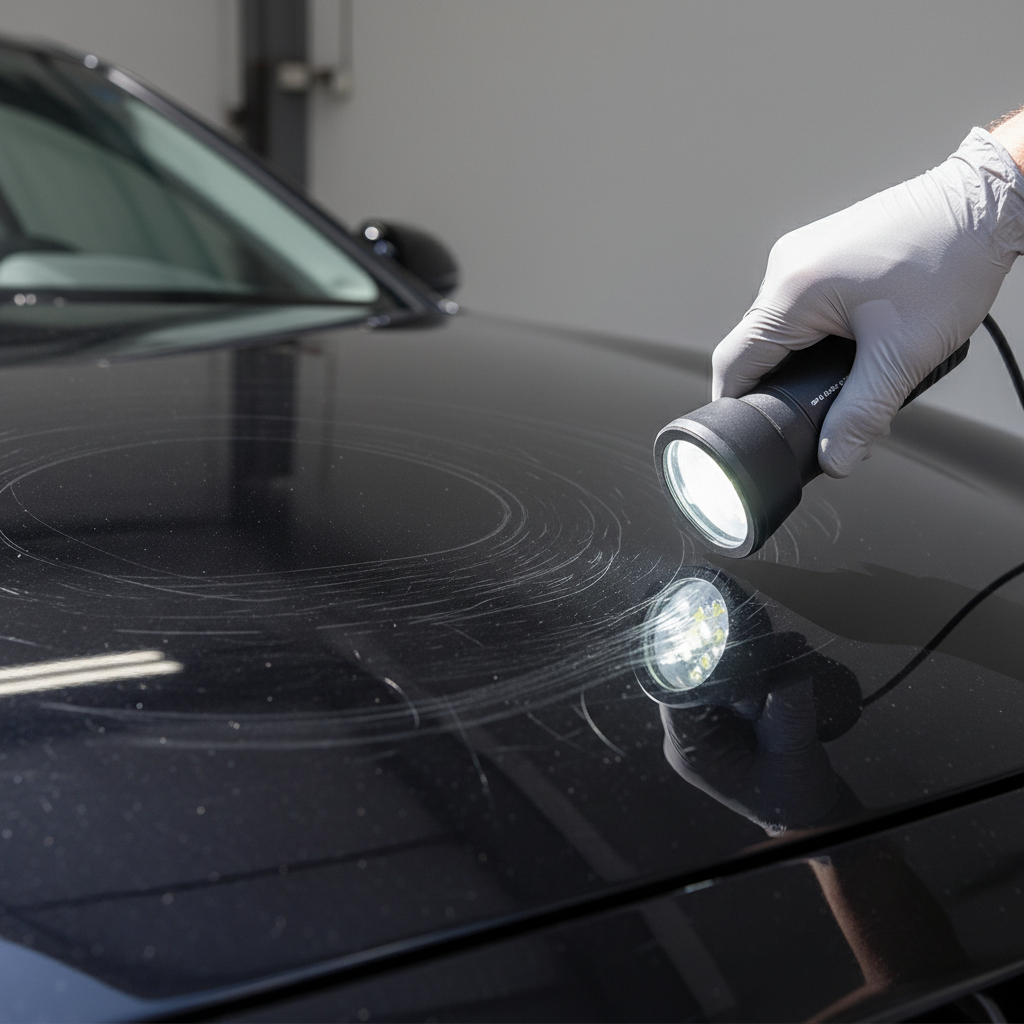
Why swirl marks show up (and why they come back)
Most swirl marks come from micro-marring, tiny scratches that scatter light. You rarely get them from “bad paint,” you get them from normal ownership habits that stack up over time.
- Improper washing and drying: one dirty sponge, one gritty towel, or a quick wipe on dusty paint can leave fine arcs.
- Automatic car washes: especially brush-style tunnels, they can add consistent circular patterns.
- Wiping with quick detailer on dirty panels: it feels safe, but if the surface carries grit, it becomes sandpaper.
- Old wax/sealant buildup: it can hide swirls temporarily, then they “reappear” after a few washes because they were never removed.
According to International Detailing Association (IDA) training materials and best-practice guidance, safe washing technique and tool choice are major factors in preventing wash-induced marring. Translation: polishing helps, but the wash process decides whether the finish stays clean.
How to choose the right polish: cut, finish, and paint type
Shopping for the best car polish for swirl marks gets messy because “polish” can mean different aggressiveness levels. In real use, you’re choosing a balance between cut and finish.
Quick definitions that actually matter
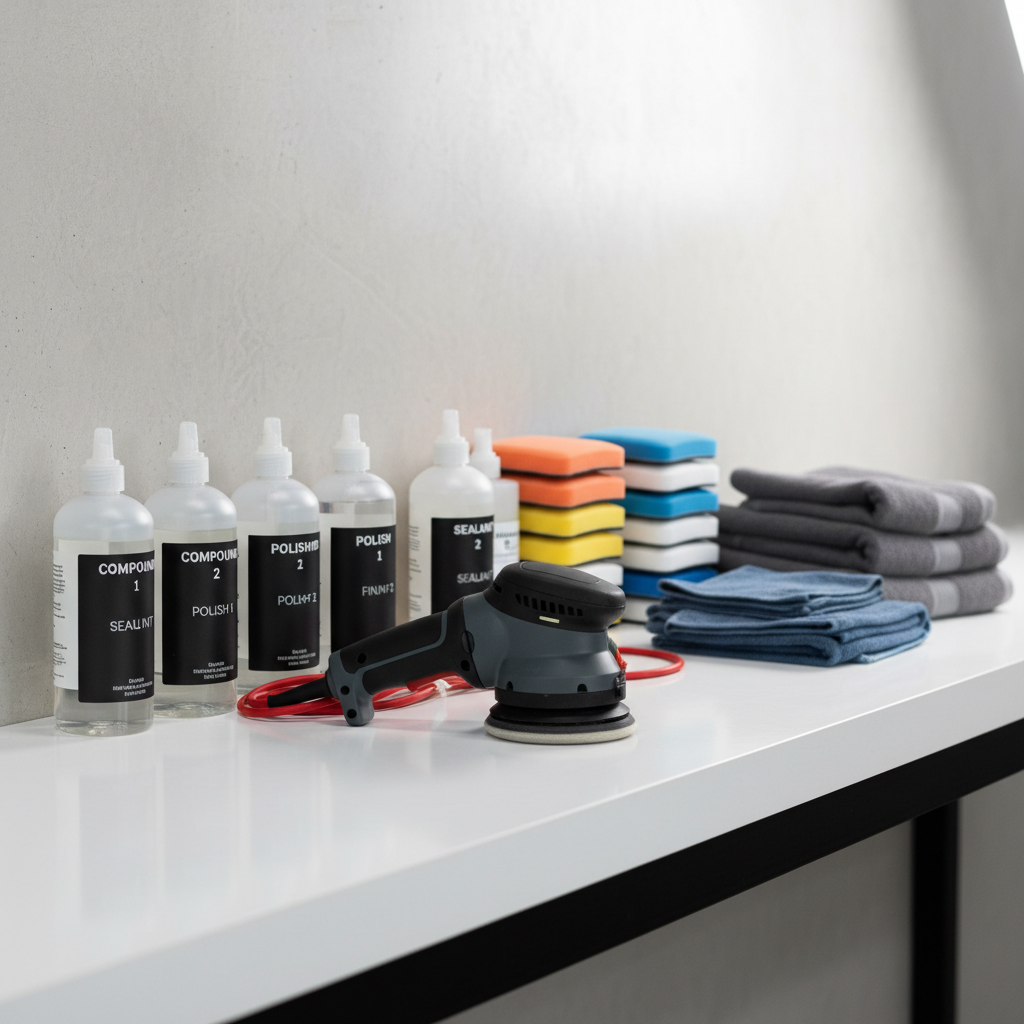
- Compound: higher cut, removes deeper defects faster, often needs a follow-up polish to refine haze.
- Medium polish: moderate cut with decent finish, common for one-step corrections on daily drivers.
- Finishing polish: low cut, high gloss, ideal for light swirls or refining after compounding.
- All-in-one (AIO): polish + protection, convenient, usually limited cut compared to dedicated correction liquids.
Paint hardness also changes the game. Many German clear coats are harder and may need more cut or more passes, while some softer paints can correct quickly but also haze more easily if you go too aggressive.
Comparison table: which polish category fits your swirl marks?
If you want a clean shortcut, start here. This doesn’t pick a single brand, it picks the type you should be shopping for, which is usually the bigger win.
| Swirl severity | What you see | Recommended product type | Typical tool match | Risk level |
|---|---|---|---|---|
| Light | Only in sun or harsh LEDs | Finishing polish | DA polisher + finishing pad | Low |
| Moderate | Obvious in most lighting | Medium polish / one-step | DA polisher + polishing pad | Medium |
| Heavy | Dense swirls + random deeper marks | Compound then finishing polish | DA or rotary + cutting then finishing pad | Higher |
| “Just want it easier” | Small swirls, limited time | AIO polish + sealant | DA + polishing/finishing pad | Low-Med |
One honest note: if you’re chasing perfection on black paint, the best car polish for swirl marks often ends up being a two-step approach, because that last 10% of clarity usually needs a refining pass.
Self-check: do you need polish, compound, or just better washing?
Before you buy anything, you want to avoid the common trap of “over-correcting.” You can remove swirls, but you’re also working on clear coat, and that’s finite.
- If swirls disappear when wet (after rain or right after a wash), they’re likely shallow, a finishing or medium polish often works.
- If you feel roughness after washing, you may need decontamination (iron remover/clay) before polishing, otherwise pads clog and results disappoint.
- If you see straight-line scratches more than circles, you’re looking at wash/dry towel marks, technique change matters as much as product.
- If defects look white/gray, or you suspect you’re through clear coat in spots, stop and get a pro opinion.
According to SEMA guidance on automotive appearance care, using the least aggressive method that achieves the goal is a common professional principle. In practice, that means you test a small section with a mild combo first.
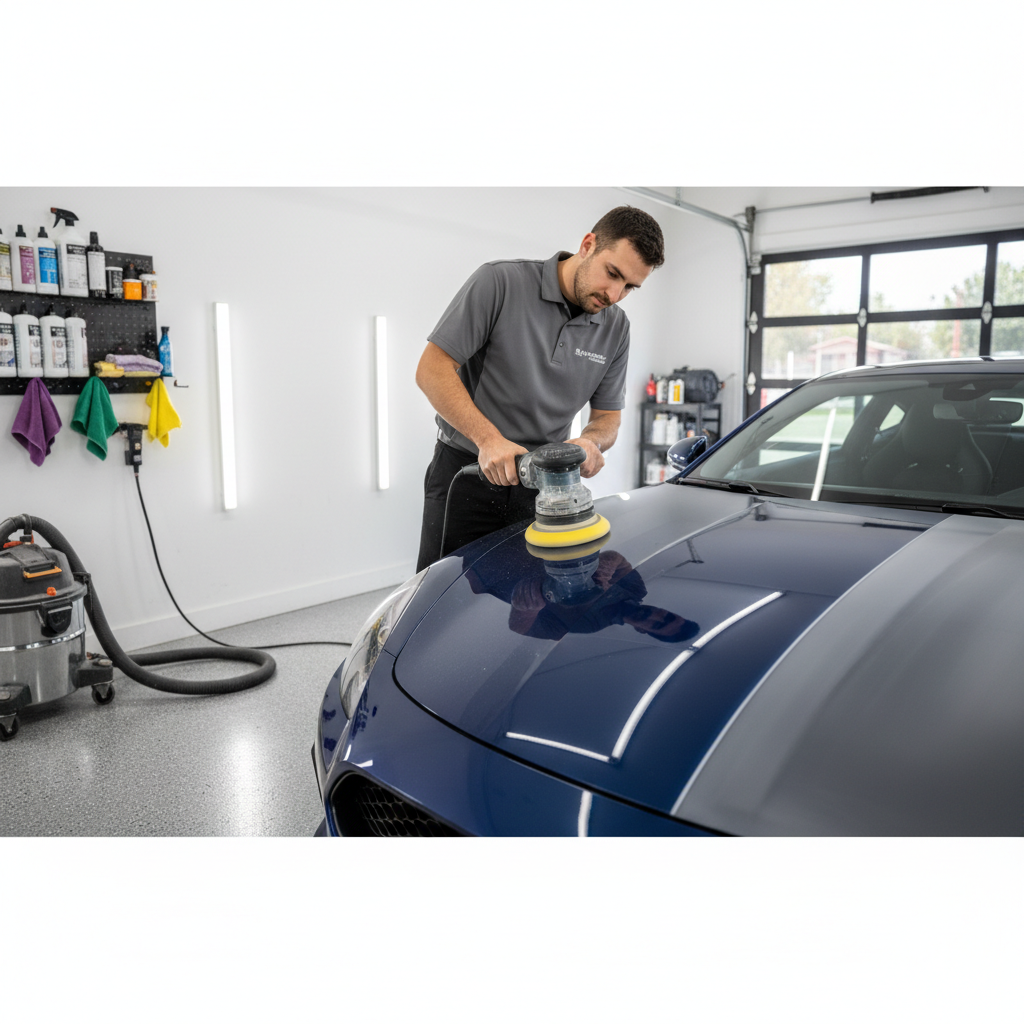
Step-by-step: removing swirls safely with a DA polisher
This is the route most DIYers should take. A dual-action polisher is forgiving, and it’s where you’ll get the best consistency if you’re aiming for the best car polish for swirl marks results at home.
1) Wash and decontaminate (don’t skip this)
- Use a pH-balanced car shampoo, quality wash mitt, and a rinse bucket if possible.
- Use an iron remover if you see brake-dust specks or feel gritty paint.
- Clay only if needed, and use plenty of lubricant to reduce marring.
2) Prep and protect the details
- Dry with a clean microfiber drying towel, light pressure, no “scrubbing.”
- Tape trim, textured plastics, badges, and sharp edges.
3) Do a test spot (your time saver)
- Start with a medium polish and polishing pad on a 2 ft x 2 ft section.
- Wipe residue, inspect under strong light.
- If swirls remain, step up pad aggressiveness or move to compound, not both at once.
4) Correct panel by panel
- Use 3–5 pea-sized drops, prime the pad lightly.
- Work a cross-hatch pattern, moderate pressure, keep the pad flat.
- Clean the pad often, clogged pads reduce cut and can re-mar.
5) Refine and protect
- If you compounded, follow with a finishing polish for clarity.
- Apply a sealant, wax, or ceramic spray to reduce future wash marring.
Hand polishing vs machine polishing: what’s realistic?
If your swirls are truly light, hand polishing can improve gloss and reduce appearance, especially with a finishing polish or AIO. But if you expect “swirl removal” on harder clear coat, hand work often turns into a lot of effort for modest change.
- Choose hand polishing when defects are minor, you’re maintaining a well-cared-for car, or you’re working tight areas.
- Choose a DA polisher when swirls show up under most lighting, or you’ve tried hand products and the finish still looks cloudy.
Also, pads matter almost as much as liquid. A great polish on the wrong pad can disappoint, while a “good enough” polish on the right pad can surprise you.
Common mistakes that keep swirls coming back
People blame the polish, but the repeat offenders are usually process mistakes. A few are subtle, and they waste weekends.
- Skipping paint prep: polishing over bonded contaminants leads to haze and pad loading.
- Using too much product: more liquid often reduces cut and makes wipe-off messy.
- Dirty towels: one contaminated microfiber can reintroduce marring during wipe-down.
- Chasing deep scratches with aggressive combos: you can improve them, but trying to “erase” everything can risk clear coat, especially on edges.
- Not changing wash habits afterward: correction is pointless if you go back to a brush wash or dry-dust wiping.
Key takeaway: the best car polish for swirl marks still needs a safe wash routine, otherwise the finish will look tired again sooner than you expect.
When it’s smarter to ask a pro
If you’re seeing defects that look like spiderwebs plus deeper random scratches, or you suspect previous heavy polishing, a pro detailer can measure paint thickness and choose a safer correction path. Many shops use paint depth gauges, which helps avoid over-correction on thin areas.
If you have respiratory sensitivities or you’re polishing in a tight garage, consider ventilation and a mask, and follow product safety instructions. When in doubt, it’s reasonable to consult a professional detailer for an inspection, especially for vintage paint, repaints, or unknown history vehicles.
Conclusion: picking the “best” polish is really picking the right system
You don’t have to memorize product labels to get a clearer finish. Decide swirl severity, start with the least aggressive combo in a test spot, and commit to wash tools that won’t re-scratch the paint.
If you want one action step today, take your car into sunlight, inspect the hood and trunk, then choose either a finishing polish for light marring or a medium one-step for daily-driver swirls, and protect the result with a sealant so your next washes feel less stressful.
FAQ
What is the best car polish for swirl marks on black paint?
Black paint shows everything, so a finishing polish that leaves a high-gloss finish is often the right second step, even if you start with a medium polish for correction. Many people end up happier with a two-step approach on darker colors.
Do I need a compound to remove swirl marks?
Not always. Light to moderate swirls often respond to a medium polish on a polishing pad. Compound makes more sense when swirls are dense and you also have deeper random scratches mixed in.
Will polishing remove clear coat?
Yes, polishing removes a small amount of clear coat because that’s how defects get leveled. In most DIY situations it’s minor, but repeated aggressive correction can add up, so a “least aggressive” test spot is a smart habit.
Is a dual-action polisher safe for beginners?
Generally, yes, a DA is considered beginner-friendly compared with a rotary because it’s less likely to burn edges when used correctly. Still, technique matters: keep the pad flat, avoid dry buffing, and work small sections.
Why do swirl marks look worse after I wax?
Some waxes and sealants can fill temporarily or change how light reflects, which can make remaining defects easier to notice in certain lighting. It can also be that the wipe-off step introduced fresh towel marring if towels weren’t perfectly clean.
Can I fix swirl marks without a machine?
You can reduce light swirls by hand, especially with a finishing polish or an AIO, but correcting moderate swirls usually takes much longer and results vary by paint hardness. If you want consistent results, a DA polisher tends to be the practical upgrade.
What pad should I use with a swirl-removing polish?
For most swirl jobs, start with a polishing pad, then adjust based on your test spot. If correction is weak, step up to a cutting pad, and if the finish hazes, step down to a softer finishing pad for the last pass.
If you’re trying to choose products and you’d rather not guess, build your plan around your test spot results: pick a medium polish plus a couple pad options, then only step up aggression if the paint truly needs it, that approach usually costs less and looks better than buying random “top rated” bottles.