
how to check car brake pad wear indicators comes down to two things: knowing what “normal” looks and sounds like on your car, and doing a quick visual check before wear turns into metal-on-metal damage.
If you wait until braking feels scary, you’re usually late, not because you’re careless, but because brake pads can go from “fine” to “replace soon” faster than people expect, especially with city driving, heavy vehicles, or lots of stop-and-go.
This guide walks you through the common indicator types, a simple DIY inspection you can do in your driveway, and a few red flags where it’s smarter to stop guessing and have a shop confirm what’s going on.
What brake pad wear indicators are (and what they are not)
Brake pad wear indicators are built-in cues that tell you the friction material is getting low. Some are purely mechanical, some are electronic, and some are “human indicators” like sound and feel that show up before a dashboard light ever does.
They are not perfect. Plenty of cars wear unevenly side-to-side or inner pad vs outer pad, so one indicator can trigger while another pad still looks acceptable, or the opposite, one pad can be nearly gone while the other looks passable from outside.
Common types you’ll see in the US
- Mechanical squealer tab: a small metal finger that touches the rotor when pads get low, often creating a high-pitched squeal during light braking.
- Electronic sensor: a wire/sensor embedded in the pad that triggers a dash warning when it contacts the rotor or breaks.
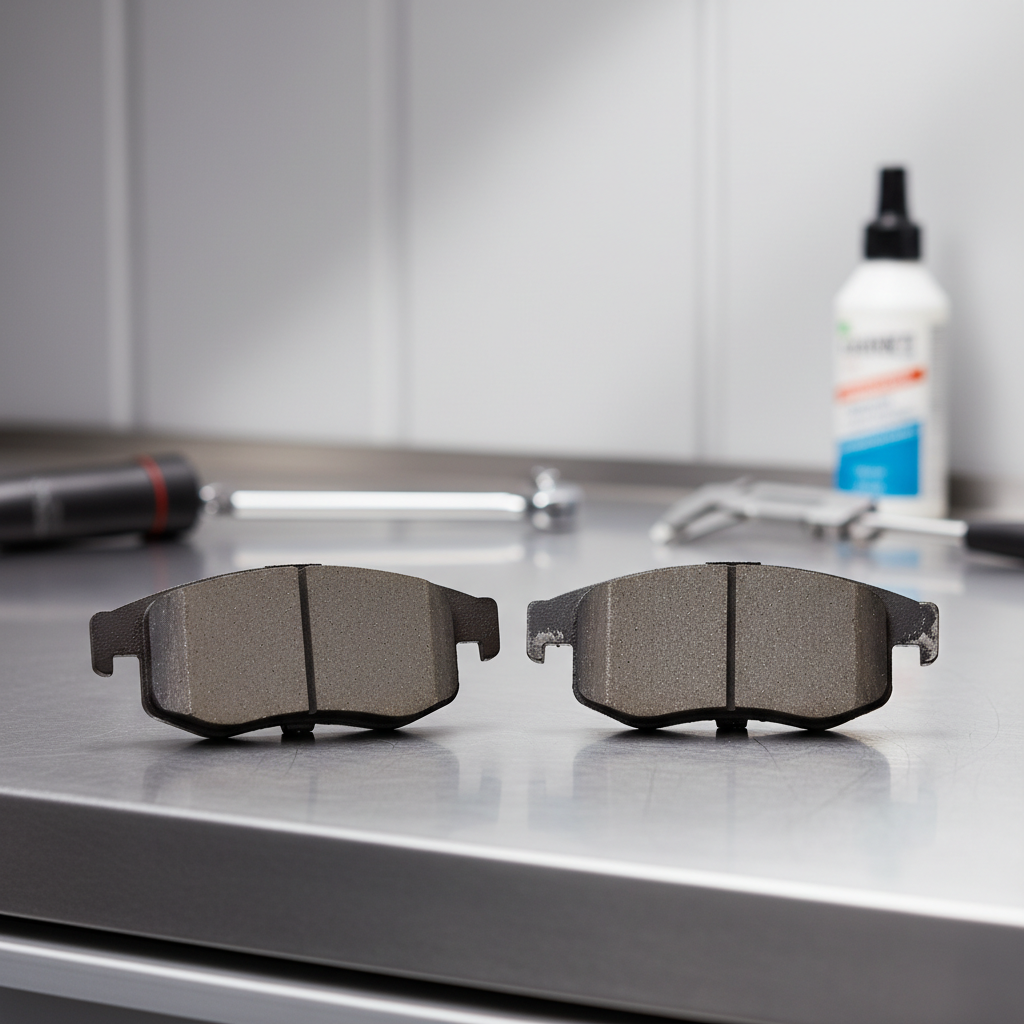
- Visual thickness reference: not a “device,” but many techs use thickness as the practical indicator, since it directly reflects remaining friction material.
Quick symptom check before you grab tools
Before you start measuring anything, listen and feel for patterns, because they often point to which wheel needs attention, and whether you’re dealing with pads, hardware, or something else.

- High-pitched squeal during light braking: commonly the wear tab, but can also be glazing or dusty pads.
- Grinding noise: often means pads are very low or gone on one corner, stop driving if possible and get it checked.
- Pulsation in pedal: can be rotor thickness variation, not strictly pad wear, but low pads can contribute.
- Pulling left/right: may relate to a sticking caliper, uneven pad wear, or tire issues.
- Longer stopping distance: could be pad compound, overheated brakes, or something hydraulic, treat it seriously.
According to NHTSA, brake system problems can affect stopping ability and vehicle control, so if you notice grinding, a sinking pedal, or major pulling, it’s reasonable to avoid “one more week” and have a professional inspect it.
DIY visual inspection: how to look at pad thickness safely
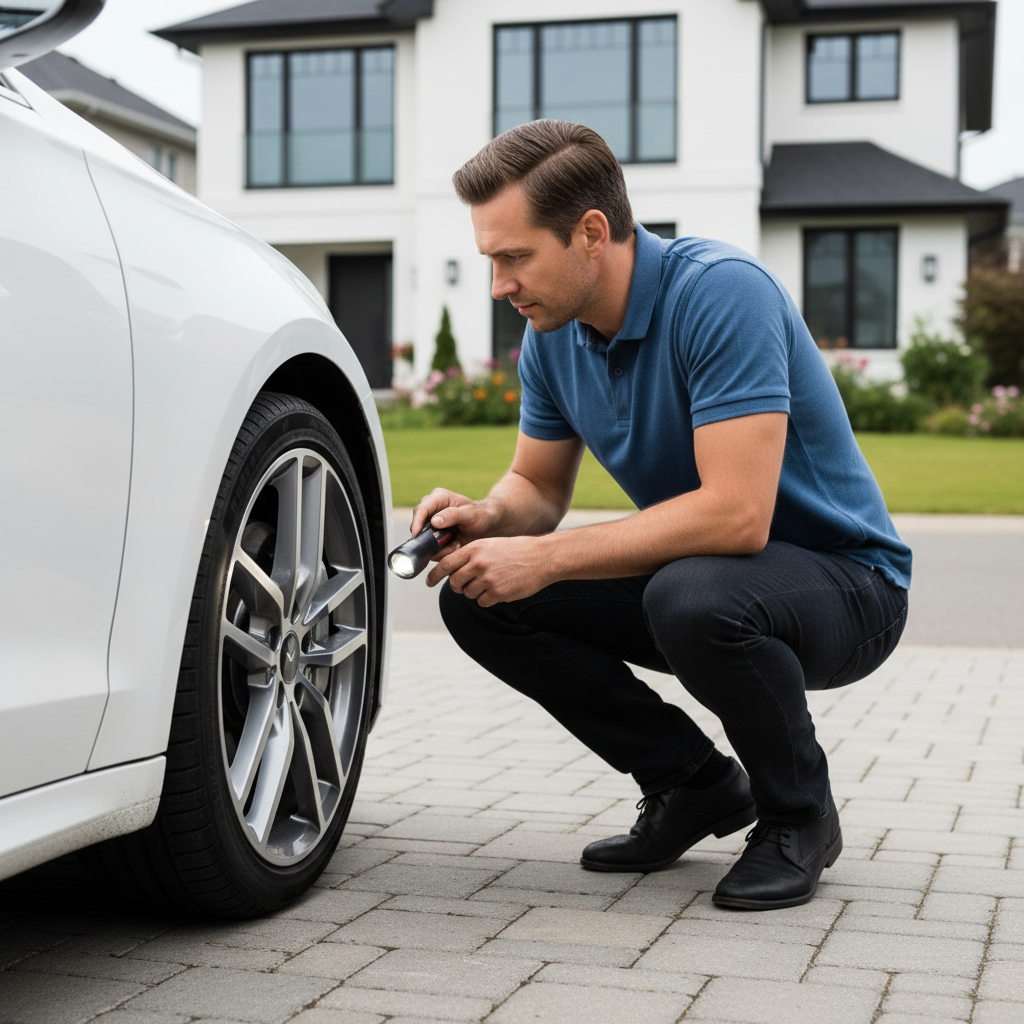
For many vehicles, the quickest way to learn how to check car brake pad wear indicators is a visual check through the wheel spokes, then a more accurate look with the wheel off if you can do it safely.
What you’ll need
- Flashlight or phone light
- Work gloves
- If removing the wheel: jack, jack stands, and a lug wrench
Step-by-step (through the wheel)
- Park on a flat surface, set the parking brake, turn wheels outward to open a view of the front brakes.
- Look for the brake rotor (shiny metal disc) and the caliper (clamp-like housing).
- Find the pad material between caliper and rotor, you’re judging the thickness of the friction material, not the metal backing plate.
- If you can only see the outer pad, remember the inner pad can wear faster, so treat this as a screening check.
If you remove the wheel (more accurate)
Only do this if you’re comfortable with safe lifting practices. According to OSHA, using properly rated jack stands and stable lifting points is a basic safety requirement in automotive work environments, and it applies at home too.
- Loosen lug nuts slightly before lifting.
- Lift the vehicle at the correct jacking point, then support it with jack stands.
- Remove the wheel and inspect both inner and outer pads on that corner.
- Check for uneven wear, cracking, or chunks missing from the friction material.
How thick is “too thin”? A practical guide (with table)
Pad thickness guidelines vary by vehicle and pad type, so treat numbers as a practical rule of thumb, not a legal standard. Many shops recommend replacement before pads get very low because it reduces rotor damage risk and keeps braking consistent.
| Pad thickness (friction material) | What it usually means | What to do next |
|---|---|---|
| 8–12 mm | Healthy range on many cars | Recheck at next tire rotation or oil change |
| 5–7 mm | Mid-life, depends on driving | Monitor, plan parts if you drive a lot |
| 3–4 mm | Getting low | Schedule replacement soon, especially before trips |
| 1–2 mm | Very low, wear indicator may trigger | Avoid delays, inspect rotors for scoring |
| 0 mm / backing plate contact | Metal-on-metal risk | Stop driving if possible, tow or immediate service |
One more nuance: if one pad is 6 mm and the opposite side is 2 mm, that gap matters more than the “average.” Uneven wear often signals hardware, caliper slide, or piston issues.
How to check electronic wear sensors and dashboard warnings
If your car has electronic pad wear sensors, a warning light can be helpful, but it’s not a full inspection. The sensor may only exist on one axle or one wheel, and wiring can be damaged during prior brake work.
- Brake warning light vs ABS light: they mean different things, don’t assume it’s “just pads.”
- Intermittent pad warning: can happen if the sensor wire rubs or the connector is loose.
- After pad replacement: some vehicles need a reset procedure or a new sensor, otherwise the light stays on.
If the dash shows a brake warning and you also notice pedal changes, burning smell, or fluid level drop, that’s beyond a pad-only situation, a shop inspection is the safer call.
Common wear patterns that change your next step
Knowing how to check car brake pad wear indicators is also about noticing patterns that predict repeat problems, because replacing pads without fixing the cause can burn through a new set quickly.
- Inner pad much thinner than outer: often a caliper slide pin issue or piston not retracting smoothly.
- Both pads thin but rotor looks heavily scored: may mean you ran past the indicator, rotor replacement could be needed.
- Tapered pad (one end thinner): can point to caliper alignment or hardware issues.
- Glazed pad surface: can happen after overheating, braking may feel less “bitey.”
According to SAE International, brake system performance depends on multiple components working together, so pad thickness is only one part of the braking picture.
Action plan: what to do based on what you find
Here’s the practical decision tree most drivers want, you check, you decide, you move on without overthinking it.
If pads look healthy and braking feels normal
- Recheck at your next tire rotation, it’s a natural rhythm that catches wear early.
- Listen for new sounds after rain or a car wash, a brief squeak can be normal surface rust.
If pads are getting low but not critical
- Price out pads and labor now, not when you’re forced to fix it tomorrow.
- If you do highway-heavy driving, you may have time, in stop-and-go you often don’t.
- Ask for a rotor condition check, scoring and thickness matter for the final bill.
If you hear grinding, feel vibration, or see very low pads
- Reduce driving immediately, avoid high-speed trips, and don’t “test” hard stops.
- Plan for possible rotors, not just pads, because damage can happen quickly.
- If braking feels unsafe, towing may be the prudent choice.
Common mistakes that waste time or money
- Only checking the outer pad: the inner pad often tells the real story, especially with slide issues.
- Confusing backing plate with friction material: the metal plate can make pads look thicker than they are.
- Ignoring uneven wear: new pads won’t fix a sticking caliper, you’ll be back soon.
- Chasing noise without context: some squeaks come from dust, hardware, or pad compound, not just “worn out.”
- Skipping safe lifting: if you’re unsure, don’t remove wheels at home, a quick shop inspection is cheaper than an injury.
Key takeaways
- Wear indicators are helpful, but not complete, visual thickness and side-to-side comparison matter.
- 3–4 mm is the “plan it now” zone for many drivers, even if you have no warning light.
- Grinding or a major change in braking feel is a stop-and-check moment, not a weekend project delay.
- Uneven wear often hints at caliper slide or hardware problems, fix the cause, not just the symptom.
Conclusion: check early, replace before it becomes rotor damage
Once you know how to check car brake pad wear indicators, the process stays simple: listen for changes, visually confirm pad thickness, and treat uneven wear as a clue that something else may need attention. If you’re near the low range or you get a dash warning, planning service a bit earlier often keeps the repair straightforward, and braking confidence stays where it should be.
If you want a clean next step, put a recurring reminder to inspect pads at tire rotations, and if anything looks uneven or sounds like grinding, book an inspection instead of guessing.
FAQ
How do I check brake pad wear without removing the wheel?
You can usually see the outer pad through the wheel spokes with a flashlight. It’s a good screening method, but if visibility is poor or you suspect uneven wear, a wheel-off check is more reliable.
What does the brake wear indicator sound like?
Many mechanical indicators make a high-pitched squeal during light braking. If the sound becomes a harsh grind, that’s more consistent with pads being extremely low or gone on one corner.
Can my brake pads be worn out even if there’s no warning light?
Yes. Many cars don’t have electronic sensors on every wheel, and some have none at all. That’s why a quick thickness check matters even when the dash looks normal.
Is 4 mm brake pad thickness safe?
In many cases 4 mm still stops fine, but it’s typically considered “replace soon,” especially if you drive in traffic or have a heavy vehicle. It’s a planning point more than a panic point.
Why is the inner brake pad wearing faster than the outer?
This often relates to caliper slides sticking or the caliper not retracting smoothly. It’s fixable, but it’s worth having a technician confirm the cause so new pads don’t wear unevenly again.
Do I need to replace rotors when I replace pads?
Not always. Rotors can sometimes be reused if they’re within spec and the surface condition is acceptable, but scoring, vibration, or running past the wear indicator can push the job toward rotor replacement.
How often should I check brake pad wear indicators?
A practical cadence is at every tire rotation or oil change, and sooner if you hear new noises. If you commute in stop-and-go traffic, checking a bit more often can prevent surprises.
If you’re doing a DIY inspection and you’re not confident about what you’re seeing, or you’d rather not lift the car, a quick brake check at a reputable local shop can confirm pad thickness, sensor status, and uneven wear before it becomes a bigger repair.