
how to clean car interior stains comes down to two things most people skip, identifying the surface and treating the stain before it sets deeper.
If you have ever scrubbed a coffee spot until the area looked fuzzy, or wiped leather seats only to leave a shiny patch, you already know the frustration, the interior looks “cleaner” but also more worn. The good news, most stains are manageable with basic tools and a little restraint.
This guide breaks it into practical scenarios, what to do for fabric, carpet, leather, vinyl, and those mystery stains you notice only when sunlight hits the seat. You will also get a quick decision checklist, a small product table, and a few “don’t do this” traps that waste time.
Before You Start: Identify the Material and the Stain
The fastest way to make a stain permanent is treating everything like carpet. Fabric, leather, and vinyl react differently to water, surfactants, and agitation.
- Fabric seats usually handle gentle upholstery cleaners, but over-wetting can push grime into foam.
- Carpet and floor mats tolerate more brushing, yet can wick stains back up if you soak them.
- Leather dislikes harsh degreasers and heavy scrubbing, it can dry out or discolor.
- Vinyl and plastic clean easily, but strong solvents may haze or strip protective coatings.
Stain type matters too. Protein stains like milk or blood behave differently than tannins like coffee and tea, and oily stains need a different approach than soda spills.
Do a Quick Spot Test (Yes, Even If You’re in a Hurry)
Pick a hidden area, dab your cleaner, wait a minute, then blot with a white towel. If you see dye transfer or surface dulling, switch products or dilute more. According to the U.S. Environmental Protection Agency, safer chemical handling includes reading labels and following directions to reduce exposure and material damage.
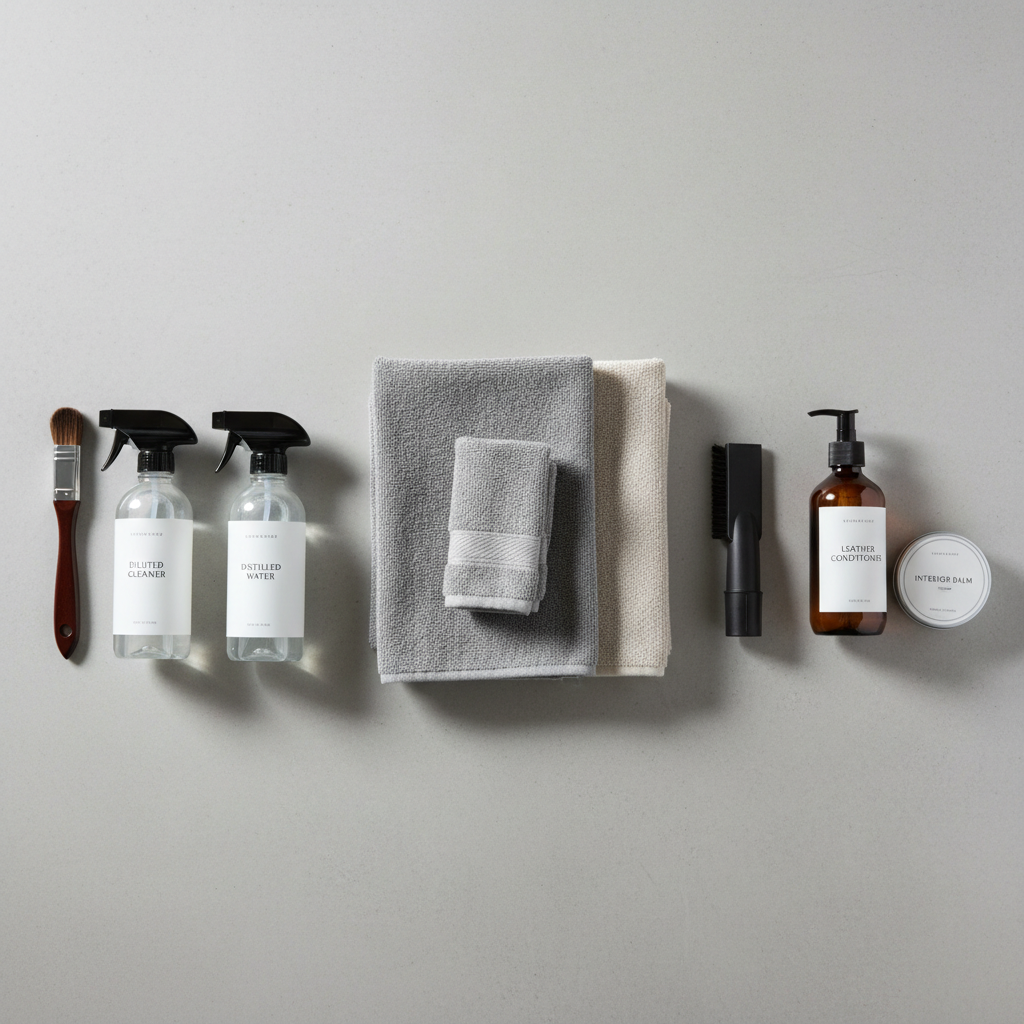
What You’ll Need (And What’s Optional)
You do not need a full detailing kit to learn how to clean car interior stains, but you do need the right basics so you blot instead of smear.
- Microfiber towels (a few, clean and dry)
- Soft upholstery brush or soft toothbrush for seams
- Vacuum with crevice tool
- Spray bottle for diluted cleaner or water
- Distilled water (helps avoid water rings in some cases)
- Cleaner matched to material (fabric upholstery cleaner, leather cleaner, all-purpose interior cleaner)
Optional but useful, a small wet/dry extractor, enzyme cleaner for organic stains, and a fan to speed drying.
Quick product selector (no brand hype)
| Surface | Common stains | Cleaner type to try | Big risk to avoid |
|---|---|---|---|
| Fabric seats | Coffee, soda, makeup | Foaming upholstery cleaner or mild detergent dilution | Over-wetting the foam |
| Carpet | Mud, salt, food | Carpet cleaner, mild APC diluted | Soaking and re-wicking |
| Leather | Body oils, dye transfer | Leather cleaner + conditioner | Degreasers, alcohol-heavy wipes |
| Vinyl/plastic | Scuffs, sticky residue | Interior APC diluted, plastic-safe cleaner | Strong solvents causing haze |
A Fast Self-Check: What Kind of Stain Are You Dealing With?
If you are stuck, use this short checklist before you scrub. It saves time and prevents the “bigger clean spot” problem.
- Is it fresh or dried? Fresh stains usually blot out, dried stains need rehydration and multiple passes.
- Is it oily or watery? Oily feels slick, attracts dust, and often needs a surfactant or mild degreaser.
- Any odor? Sour smells often suggest organic spills that respond to enzyme cleaners.
- Is there color transfer? Dye from jeans or a marker behaves differently than food.
- Did it soak into padding? If yes, you may need extraction and longer drying.
Key takeaway: if you cannot name the stain, treat it gently, blot, rinse lightly, and repeat, harsh chemistry is what tends to cause visible damage.
Step-by-Step: Fabric Seats and Carpet Stains
For most daily-driver messes, this is the routine that works. It is also the least likely to leave halos.
1) Dry removal first
Vacuum thoroughly, then lift crumbs or dried bits with a soft brush. Cleaning liquid plus grit equals abrasion.
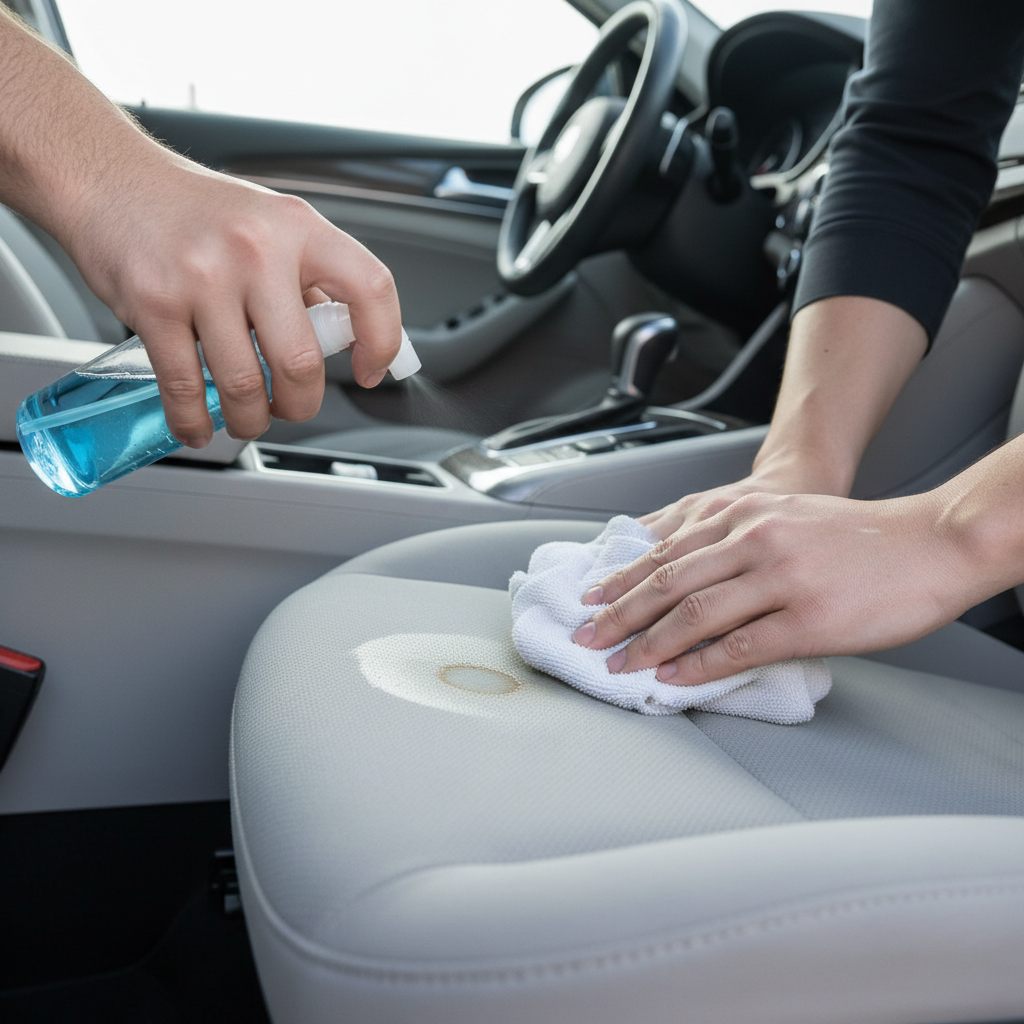
2) Blot, don’t rub
Press a microfiber towel into the stain to pull moisture up. Rubbing drives it sideways and deeper.
3) Apply cleaner sparingly
Mist the cleaner onto the towel or lightly onto the stain, then work from the outside edge toward the center. This helps prevent spreading.
4) Agitate gently and pause
Use a soft brush for a few seconds, then let the cleaner dwell. Most products need time to loosen residue, constant scrubbing is rarely the win.
5) Rinse lightly to avoid residue
Mist distilled water and blot again. Leftover soap can attract dirt and make the spot return faster than you expect.
6) Dry it fast
Blot with a dry towel, then run a fan or crack windows. If the seat foam stays damp, odors and mildew become more likely, and that is when people decide the stain “came back.” According to CDC guidance on mold, keeping materials dry is a practical way to reduce mold growth indoors, cars are not special in that regard.
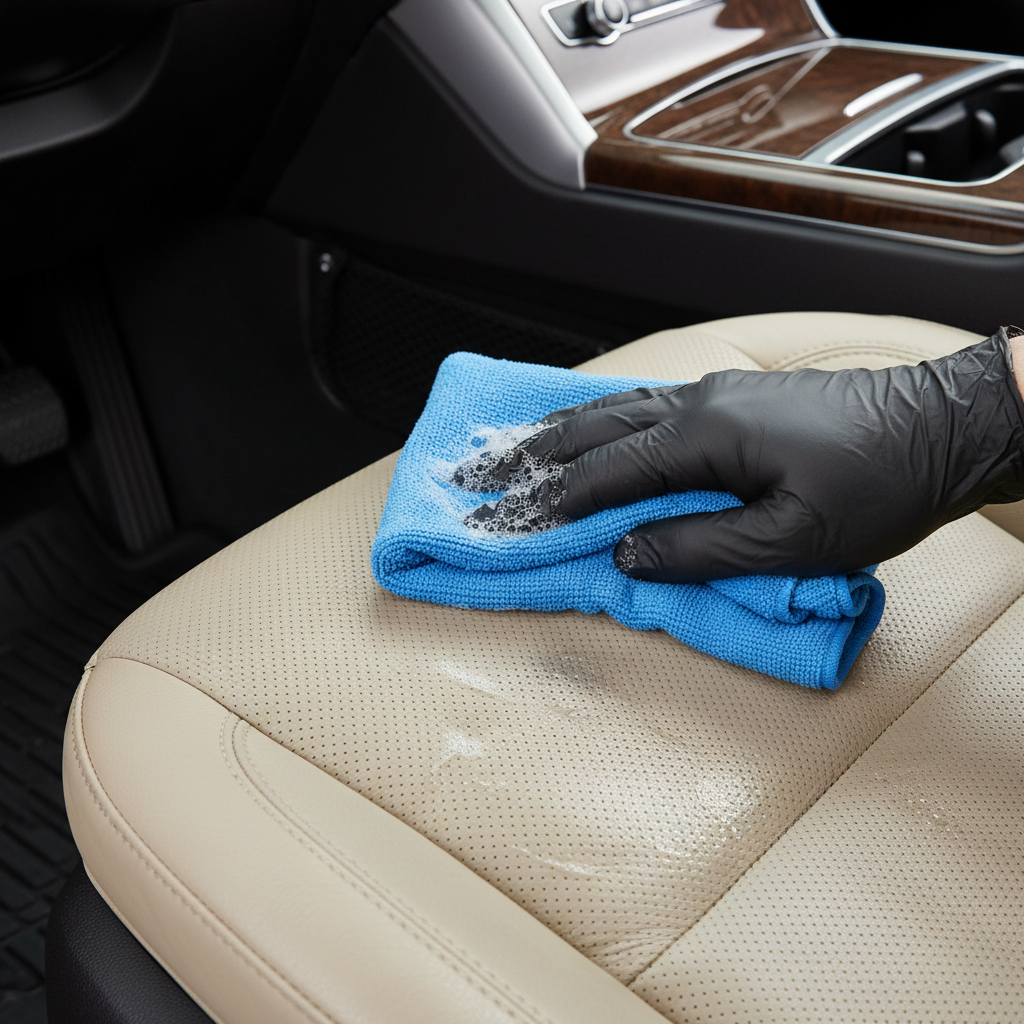
Step-by-Step: Leather, Vinyl, and Plastic Stains
Hard surfaces feel easier, yet they show mistakes more, especially leather. The goal is clean without stripping the finish.
Leather seats
- Vacuum seams first, grit in stitching acts like sandpaper.
- Apply leather cleaner to a towel, not directly to the seat, then wipe in small sections.
- For dye transfer, use a dedicated leather-safe cleaner and stop once improvement slows, chasing “perfect” can remove pigment.
- Finish with a light conditioner if the leather feels dry, many modern coated leathers need less than people think.
Vinyl and plastic panels
- Use a diluted interior all-purpose cleaner, wipe, then buff dry.
- For sticky residue, warm water plus mild cleaner often works before you reach for stronger options.
- Avoid heavy solvent use unless the product label says plastic-safe, hazing is hard to reverse.
Common Stains and What Usually Works
This is where people want a one-liner, but reality depends on material and how long it sat. Still, these starting points usually get traction.
- Coffee/tea on fabric: upholstery cleaner, gentle brushing, light rinse, repeat as needed.
- Soda/juice: treat quickly, rinse well to remove sugar, then dry thoroughly.
- Grease/fast food: blot, use a fabric-safe degreasing cleaner lightly, rinse, avoid soaking.
- Milk/protein spills: enzyme cleaner can help, especially if odor remains after cleaning.
- Mud: let it dry, vacuum, then clean, wet mud spreads and stains wider.
- Salt rings on carpet: light vinegar-water mix sometimes helps, then rinse with plain water, spot test first.
If you are dealing with biohazards like blood, or strong chemical exposure, take a cautious approach. According to OSHA, chemical hazards vary and labels and safety data sheets guide safe handling, and in some cases professional cleaning is the safer route.
Mistakes That Make Stains Worse (And Waste Your Saturday)
- Over-wetting seats, the stain disappears then returns as moisture wicks contamination back up.
- Using household bleach or strong solvents, discoloration often becomes the new “stain.”
- Scrubbing aggressively, fabric pills, carpet frays, leather finish dulls.
- Skipping the rinse step, soap residue attracts dirt and leaves crunchy texture.
- Cleaning only the dot, you sometimes need to feather the edges so the cleaned area blends.
When DIY Isn’t Enough: Know When to Call a Pro
Learning how to clean car interior stains covers most daily messes, but a few situations deserve professional tools or expertise.
- Stains soaked into seat foam and odor persists, extraction and ozone or professional deodorizing may be appropriate.
- Large areas of dye transfer on leather, wrong chemistry can permanently alter finish.
- Mold concerns after flooding or long-term moisture, this can affect health, consider a detailer experienced with remediation and, if symptoms occur, consult a medical professional.
- Unknown chemical spills, battery acid, fuel, strong cleaners, safer to get guidance than experiment.
Practical Wrap-Up and a Simple Routine That Keeps Seats Clean
Most interiors stay presentable when you treat spills early, clean with the mildest product that works, and dry faster than you think you need. If you pick one habit, keep a couple microfiber towels in the car and blot immediately, that alone prevents a lot of “permanent” marks.
If you want an easy next step, build a small kit, a fabric-safe cleaner, a leather-safe cleaner, and a dedicated towel, then do a 10-minute reset every few weeks. Your future self notices.
FAQ
How do I remove old stains from car seats without an extractor?
You usually can, but plan on multiple light passes, rehydrate with a mist of water, apply upholstery cleaner sparingly, blot, then rinse and blot again, drying well between rounds.
What is the safest way to clean car interior stains on leather?
Use a leather-specific cleaner on a microfiber towel, work gently in small sections, and stop when improvement slows. If the leather looks dull or sticky, your product may be too strong or leaving residue.
Can I use vinegar on car carpet stains?
Sometimes a mild vinegar-water mix helps with mineral or salt residue, but it is not universal. Spot test first, and rinse with plain water after so the area does not smell or attract dirt.
Why do stains come back after I clean them?
Re-wicking is common, moisture pulls leftover contamination from padding back to the surface as it dries. Cleaner residue also attracts soil, a light rinse and better drying usually fix this.
Is steam cleaning safe for car interiors?
It can be, but it is easy to overheat or over-wet seams, adhesives, and leather finishes. If you try steam, use low moisture, keep the nozzle moving, and avoid prolonged heat on one spot.
How do I clean vomit stains and smell from a car seat?
Remove solids, blot, clean with an upholstery cleaner, then consider an enzyme cleaner to address remaining organic residue. If odor persists after drying, extraction or professional odor treatment may be necessary.
What should I avoid using on plastic interior panels?
Avoid harsh solvents and abrasive pads, they can haze clear plastics and dull textured trim. A diluted interior cleaner plus a microfiber towel is usually enough for most grime.
If you are dealing with recurring stains, strong odors, or a material you do not want to risk, you may prefer a more hands-off approach, a local detailer can often assess the surface quickly and choose a method that avoids trial-and-error at home.