
how to replace car headlight bulb led is usually a straightforward DIY job, but the part that trips people up is not the swapping, it’s choosing an LED kit that actually fits your housing, clears the dust cap, and still throws a usable beam.
If you do it right, you get quicker on-off response, a whiter color, and often better visibility. If you do it “mostly right,” you can end up with glare, flicker, or a headlight that looks bright in the driveway but performs worse on a dark road.
This guide walks you through the real-world steps, plus the judgment calls: when an LED conversion makes sense, how to avoid common install mistakes, and how to aim the lights after the swap so you’re not blinding everyone.
Before you start: should you convert to LED?
Not every headlight setup loves LEDs. In many cases, the housing design matters more than the bulb itself. A reflector housing that was engineered for halogen filament position can scatter LED light if the LED emitters don’t mimic that filament location.
According to NHTSA, headlamp performance and glare control are key safety considerations, and modifications that change the light source can affect compliance. That doesn’t mean you can’t do an LED swap, it means you should be picky about fitment, beam pattern, and aiming.
- Good candidates: projector housings with a defined cutoff, vehicles with easy rear access, drivers who will take time to aim lights afterward.
- Higher-risk candidates: older reflector housings, vehicles with tight dust-cap space, cars that already have electrical sensitivity or bulb-out warnings.
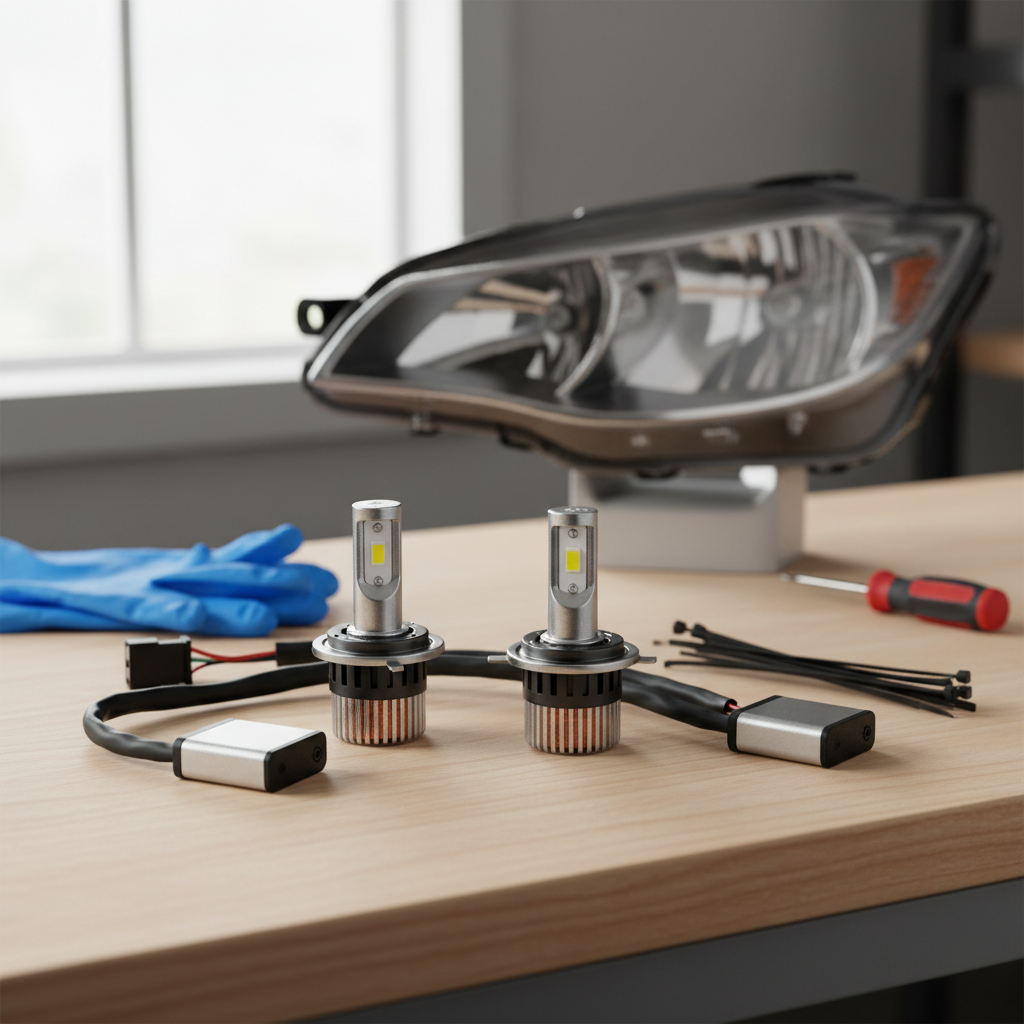
What you’ll need (and what’s optional)
Most LED conversions can be done with basic hand tools. The trick is having the right “small stuff” ready so you don’t stop halfway with a headlight open.
- LED bulbs in the correct size (examples: H11, 9005, 9006, H4, H7)
- Owner’s manual or a fitment guide to confirm bulb type and access steps
- Nitrile gloves (keeps oils off parts and saves your knuckles)
- Small flathead or trim tool for clips
- Zip ties and adhesive pads for securing drivers/wiring
- Optional: CAN bus decoder/anti-flicker module if your vehicle needs it
Key point: Plan for heat management and space. Many LED bulbs have a fan or heat sink, and the driver box needs somewhere safe to sit.
Quick fitment check: bulb type, space, and legality
Do this before you remove anything. It saves you from the classic problem: LED bulb fits the socket, but the dust cap won’t close, or the connector orientation interferes with the housing.
- Confirm bulb size by checking the owner’s manual or pulling the old bulb and reading the base marking.
- Check rear clearance behind the headlight for a heat sink/fan and wiring bend radius.
- Look for a dust cap and decide how you’ll seal it back up. Leaving it open often invites moisture and haze.
- Know your housing type: projectors usually tolerate LEDs better than open reflectors.
If your vehicle uses adaptive headlights, factory HID, or LED modules, conversions may not apply at all. In those cases, it’s often a different repair path, and a shop may be the safer move.
Step-by-step: how to replace your headlight bulb with an LED
Below is the general workflow for most U.S. vehicles. Exact access varies: some cars let you reach from the engine bay, others require removing a cover, the battery, or even part of the bumper. If access is tight, don’t force your wrist into a bad angle, it’s how clips break.
1) Park safely and cut power
Turn off the car, set the parking brake, and let the headlight area cool down. LEDs run cooler in forward heat, but the area around a halogen bulb can be hot if you drove recently.
- If you want extra caution, disconnect the negative battery terminal, especially on vehicles sensitive to bulb-out detection.
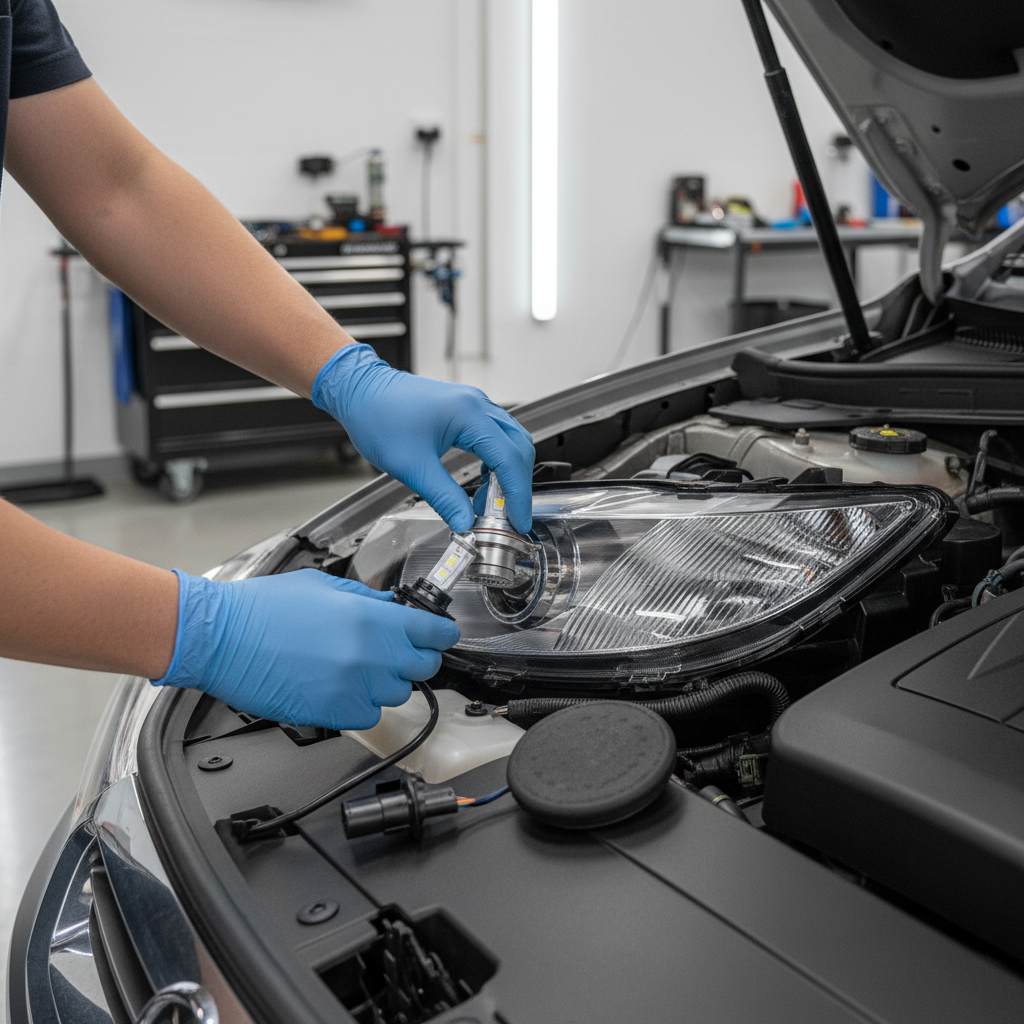
2) Access the back of the headlight
Remove any covers, intake snorkels, or access panels blocking the headlight rear. Keep clips organized; some are easy to lose in the engine bay.
3) Remove the old bulb
Unplug the connector, then rotate the bulb base (commonly counterclockwise) and pull it out. Avoid yanking on wires. If there’s a retaining clip (common on H7/H4 styles), release it gently.
4) Prep and install the LED bulb
Seat the LED bulb fully and lock it in the same way as the original. Many LED designs need the emitters oriented left-right (roughly 3 and 9 o’clock) to mimic a halogen filament and reduce scatter, but it depends on the bulb design.
- Don’t pinch the O-ring or the bulb may not seal, which often leads to condensation.
- Keep the LED driver away from hot parts and moving belts.
5) Connect wiring and secure the driver
Connect the factory plug to the LED’s input. If polarity matters and it doesn’t light, flip the connector if your design allows. Mount the driver box with zip ties or adhesive pads so it won’t rattle.
6) Test before reassembling
Turn on low beams, then high beams if you replaced both. Check both sides for matching color and brightness. If you see flicker, dashboard warnings, or one side intermittently dropping out, you may need a decoder module or a different bulb set designed for your vehicle’s electrical system.
7) Reinstall dust caps and covers
Make sure the rear cap seals fully. If it cannot close, don’t just leave it off. Many people end up with moisture, corrosion, and foggy lenses months later. Consider a bulb designed for shorter depth, or a proper sealing solution designed for automotive headlamps.
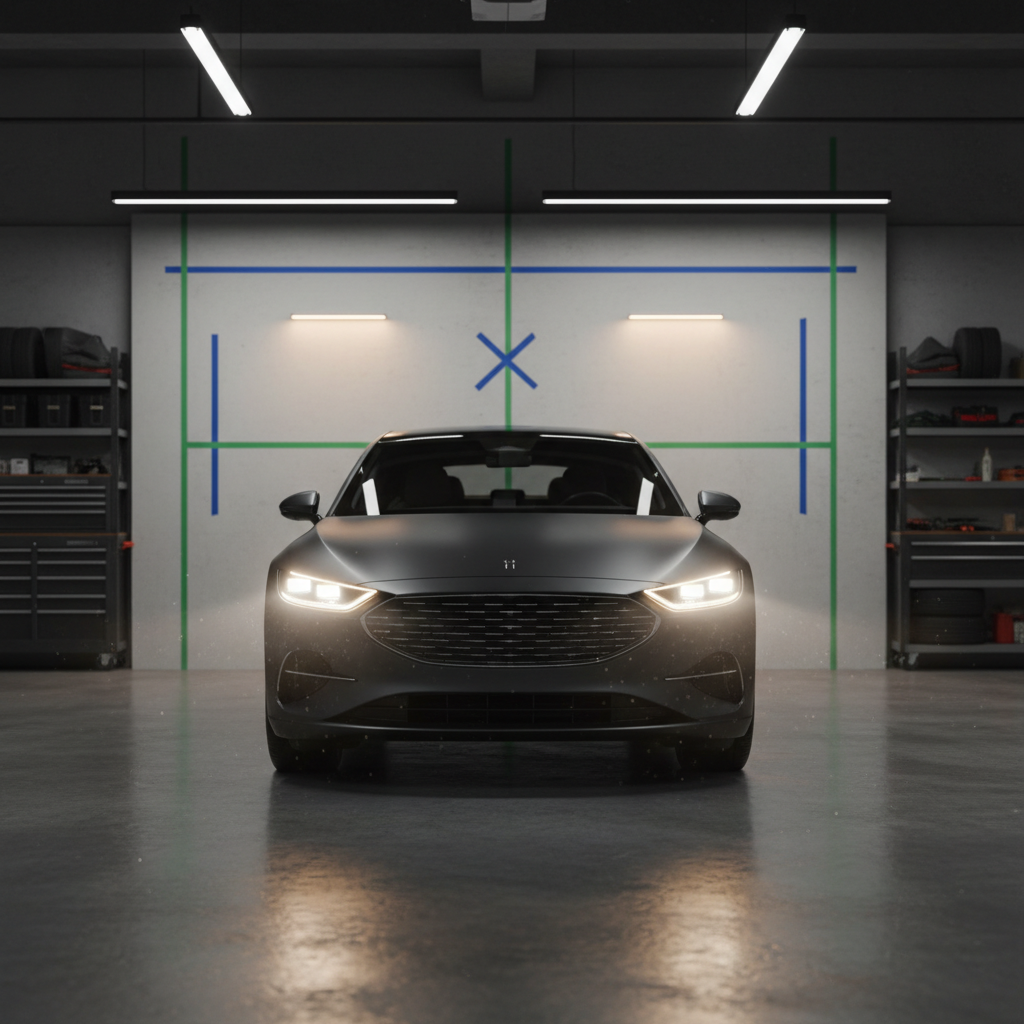
Aim your headlights (this is where conversions succeed or fail)
Even when installation is perfect, aiming can make the beam feel “worse” if it’s too high, too low, or uneven side-to-side. This is also the part that helps reduce glare for other drivers.
According to SAE International lighting standards discussions commonly referenced by manufacturers, proper beam pattern and aim are essential for road illumination without excessive glare. You don’t need lab gear, but you do need a flat surface and patience.
- Park 25 feet from a flat wall on level ground.
- Measure from ground to the center of each low-beam projector/reflector and mark that height on the wall with tape.
- Turn on low beams and adjust so the cutoff line (or brightest hotspot for reflectors) sits slightly below the tape line.
- Match left and right sides as closely as practical.
Quick reality check: If your LED low beams throw lots of light above the cutoff in a projector, or the pattern looks like a fuzzy blob in a reflector, aiming won’t fully fix that. That’s usually a bulb design mismatch with your housing.
Troubleshooting: flicker, bulb-out warnings, dim output, and moisture
Most post-install issues fall into a few buckets. The fix depends on the symptom, so don’t buy random add-ons until you identify what your car is doing.
| Problem | Likely cause | Practical fix |
|---|---|---|
| Flicker at idle | PWM voltage control, incompatible driver | Try an anti-flicker module or vehicle-specific LED kit |
| Bulb-out warning on dash | Low current draw vs halogen | CAN bus decoder or load resistor, installed safely away from plastics |
| One side doesn’t light | Polarity, loose connector, defective driver | Re-seat plugs, swap sides to isolate bulb vs vehicle wiring |
| Looks bright up close, weak on road | Poor beam focus in your housing | Try a different LED design or return to high-quality halogen |
| Condensation in housing | Dust cap not sealed, vent blocked | Restore sealing, check vents, avoid leaving rear open |
Common mistakes that waste time (or create glare)
Most “LED conversions are terrible” stories come from a few repeat mistakes. They’re easy to avoid once you know what to watch for.
- Buying by color temperature only: 6000K might look cool, but beam focus and output matter more than a whiter tint.
- Skipping aim: Even a small height change can push light into oncoming traffic’s eyes.
- Ignoring sealing: An unsealed dust cap often leads to moisture and lens haze.
- Loose driver box: Rattles turn into broken wires, especially in cold weather.
- Assuming “fits” means “works”: Socket compatibility is only step one.
Key takeaways: prioritize fitment, beam pattern, and aiming, and treat “extra brightness” claims with some skepticism until you see the pattern on the wall and on the road.
When it’s smarter to get professional help
If you’re comfortable with light DIY, you can usually handle how to replace car headlight bulb led on your own. But there are scenarios where a shop saves you money and frustration.
- Access requires bumper removal or the headlight assembly must come out.
- Your vehicle throws persistent electrical faults after install.
- You see heavy glare and can’t get a clean pattern even after re-seating and aiming.
- You have adaptive or self-leveling headlights, where calibration might matter.
If you’re unsure about road legality or inspection rules in your state, it’s reasonable to ask a local inspection station or a lighting-focused shop before you invest in extra modules.
Conclusion: a clean LED swap is mostly about prep and aiming
If you want your conversion to feel like an upgrade, focus on the non-glamorous parts: confirm fitment, mount the driver securely, keep the housing sealed, and spend the extra 15 minutes aiming. That’s what separates a bright-looking headlight from a genuinely useful one.
Your next move can be simple: verify your bulb size tonight, then set aside a short weekend window to install and aim in one session, so you’re not driving around with a “close enough” beam.
FAQ
How long does it take to replace a headlight bulb with LED?
Many vehicles take 20–60 minutes for both sides if access is easy. If you need to remove covers, the battery, or part of the bumper, it can stretch longer, so plan extra time for aiming.
Do I need to disconnect the battery for an LED headlight conversion?
Often you can swap bulbs without disconnecting the battery, but it’s a cautious step if your vehicle is sensitive to electrical changes or if you’ll be moving wiring near metal tools.
Why do my LED headlights flicker after installation?
Flicker usually comes from the car’s voltage control method or an LED driver that doesn’t match it. An anti-flicker module or a vehicle-specific kit often helps, but it’s worth confirming the connection is tight first.
What’s the right color temperature for LED headlights?
A lot of drivers land around 5000K–6000K for a white look. Past that, the light can look very blue and may perform worse in rain or fog, even if it seems bright in clear weather.
Can I put LED bulbs in reflector headlights?
Sometimes it works acceptably, sometimes it throws glare and uneven light. If you try it, check the beam pattern against a wall and do a night drive on a familiar road, then be willing to change course if the output is scattered.
Why won’t my dust cap fit after installing LED bulbs?
LED bulbs can be longer due to the heat sink or fan. If the cap won’t seal, avoid leaving it open; consider a shorter-profile LED bulb or a sealing solution designed for headlamp service access.
Do I need load resistors or CAN bus decoders?
Only if your car shows bulb-out warnings, hyper-flashing (more common on turn signals), or persistent flicker. Many kits work fine without add-ons, so it’s better to diagnose symptoms before buying parts.
If you’re trying to upgrade lighting but want fewer surprises, look for an LED kit that’s explicitly designed around your bulb type and vehicle electrical behavior, and double-check you can keep the housing sealed and the beam properly aimed before you commit.