
Best car touch up paint pen shopping looks simple until you realize most “bad results” come from a color mismatch, rushed prep, or using the wrong tip for the damage.
If you want chips to stop spreading and look less noticeable, the right pen matters, but so does how you use it. A good match and decent technique can make a daily-driver repair look tidy from a normal viewing distance, which is usually the real goal.
This guide breaks down what to look for in 2026, how to choose by damage type, and how to apply touch-up so it blends better. I’ll also call out the common traps that make even a premium pen look worse than leaving the chip alone.
What makes a touch up paint pen “best” in real life
Most people judge a pen by how glossy it looks in the cap photo. In practice, the “best” option is the one that matches your factory paint system and gives you control at the chip size you actually have.

Color accuracy beats everything else. Even a “great” paint formula looks wrong if the code is off, the car has faded, or the paint type differs. According to PPG (an automotive refinish paint manufacturer), proper color matching depends on variables like variant formulas and application conditions, not just a single paint code.
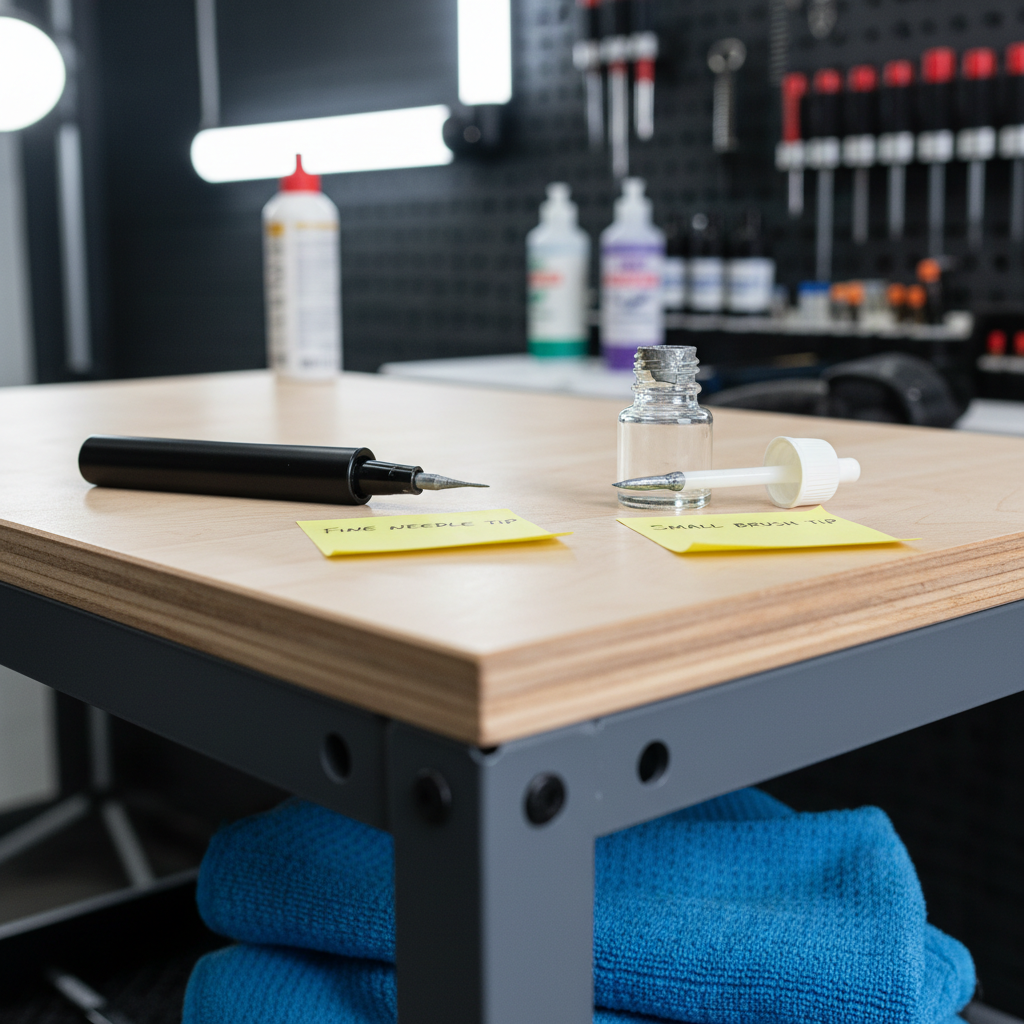
Tip design controls the outcome. A needle tip can place paint into tiny stone chips without flooding the edges, while a brush tip can level slightly better on longer scratches. Many kits include both because one tip rarely fits every defect.
Paint system matters. Modern vehicles commonly use basecoat/clearcoat finishes. Single-stage touch-up exists too, but many OEM colors are effectively “color + clear.” If you only dab color into a chip and skip clear where it’s needed, the repair can look dull or sink over time.
Quick self-check: what kind of damage are you fixing?
Before you pick the best car touch up paint pen for your situation, identify the defect. The same pen can perform well on chips and look terrible on a long scrape, mostly due to expectations.
- Pinpoint stone chips: tiny dots on the hood/bumper; best with needle tip or micro-applicator.
- Short scratches (1–3 inches): often clearcoat-only; may need polishing rather than paint.
- Key marks / longer scratches: risk of visible edges; careful leveling and clearcoat become more important.
- Down to metal or plastic: needs corrosion control or adhesion steps; paint pen alone may not be enough.
- Rust present: requires rust removal/neutralization; otherwise it tends to creep under the new paint.
Key point: If the scratch catches a fingernail, it usually needs filling. If it doesn’t, polishing or a scratch remover might get you further than any pen.
Types of car touch-up pens and when each works best
In 2026, the market still clusters into a few predictable categories. The differences are less about “new tech” and more about control, paint quality, and whether the color is mixed to your code.
1) OEM code-matched pens
Best for owners who want a straightforward path to the correct color family. You still can see mismatch if your paint has faded, but it’s usually a safer starting point.
2) Aftermarket code-matched systems (pen or bottle + applicators)
Often better value and sometimes more flexible applicators. Quality varies by supplier, so pay attention to whether they support color variants, and whether they provide a compatible clearcoat.
3) “Universal” pens
Convenient, but high risk on anything beyond tiny chips. Universal blacks/whites can be “close enough” on older cars, but metallics and pearls rarely blend well without proper formula matching.
4) 2-in-1 color + clear combo pens
Convenient, but the clear side can be thick, and the tip can be too blunt for small chips. They can work nicely for medium chips where speed matters more than perfection.
Buying criteria that actually affect results (2026 checklist)
This is the short list I’d use when trying to find the best car touch up paint pen for a daily driver, not a show car.
- Paint code support: Confirm the exact OEM code, and if possible, check for color variants tied to your production date.
- Applicator options: Needle tip for tiny chips, fine brush for slightly larger fills, and ideally micro brushes for cleanup.
- Clearcoat compatibility: If your vehicle is basecoat/clearcoat, look for a matched clear designed to go over that color.
- Dry time and leveling behavior: Faster isn’t always better; paint that flashes too quickly can leave ridges.
- Instructions that mention prep: If a kit acts like prep “doesn’t matter,” that’s a red flag.
- Return or exchange policy: Color mismatch happens; good sellers acknowledge that reality.
According to 3M (a major automotive refinish and abrasives supplier), surface preparation is a key factor for adhesion and finish quality. That lines up with what most people see at home: skipping prep causes fisheyes, poor bonding, and rough texture.
At-a-glance comparison table (what to pick for your situation)
Brands change, listings come and go, but the selection logic stays stable. Use this table to narrow the type, then shop within that type.
| Scenario | Best pen type | Why it tends to work | Watch-outs |
|---|---|---|---|
| Tiny stone chips on hood | Code-matched with needle tip | Precise placement, less edge flooding | Needs multiple thin fills, patience required |
| Medium chips (2–5 mm) | Code-matched + separate clearcoat | Better depth and gloss control | Clear can blob if applied too heavy |
| Long scratch (primer exposed) | Bottle + fine brush (not just pen) | More consistent stroke and fill | Blending is hard, may stay visible |
| Black/white solid colors, older car | OEM or quality aftermarket match | Solid colors blend easier than metallics | Fading can still make “right code” look off |
| Metallic or pearl colors | Code-matched + careful dab method | Minimizes metallic flop differences | Brushing can streak metallic; avoid overworking |
How to use a touch-up pen so it looks less obvious
The technique is where most results get made or ruined. This approach aims for “clean and subtle,” not “invisible under a spotlight.” If you’re unsure about solvents or sanding, it may be safer to consult a body shop.
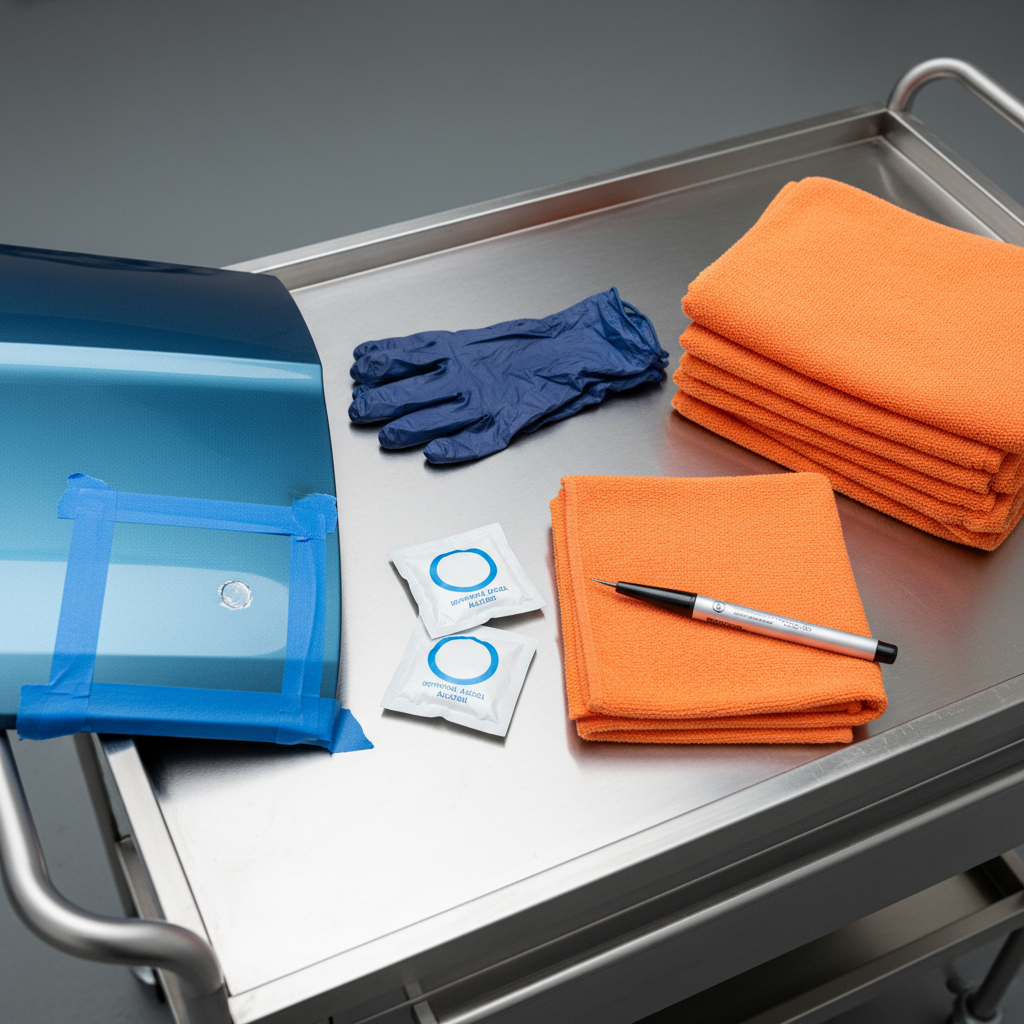
1) Clean and decontaminate (don’t skip this)
Wash the area, then wipe with a body-shop-safe wax and grease remover or isopropyl alcohol (test carefully). Any wax, sealant, or road film can cause fish-eyes or poor adhesion.
- Work in shade, panel cool to the touch.
- Use a lint-free cloth, not a fuzzy towel.
2) If there’s rust, handle it before paint
Light surface rust needs removal and often a rust converter or primer step, depending on the product system. Painting over rust usually fails later, even if it looks okay for a week.
3) Shake, mix, and test the color
Shake longer than you think, especially with metallics. Then test on a hidden spot or a plastic spoon. You’re checking hue and flop (how metallic changes with angle).
4) Fill in thin layers, don’t “paint” the whole area
For chips, dot paint into the crater and let it shrink back as it dries, repeating until it sits slightly proud of the surface. For scratches, place paint only where color is missing, keeping the edges tight.
- Needle tip: touch the chip, let capillary action pull paint in.
- Brush tip: light passes, avoid scrubbing back and forth.
5) Add clearcoat when appropriate
If your finish is basecoat/clearcoat, apply clear after the color flashes and firms up, following the product’s guidance. Too much clear is a common cause of a “blob” that catches the eye.
6) Level and polish only after full cure
Many people wet sand too early, pull semi-soft paint, then blame the pen. Let it cure. Then, if needed, very gentle leveling and polishing can reduce the edge line. If you’re not experienced with sanding, practice elsewhere or ask a pro, because it’s easy to burn through surrounding clearcoat.
Common mistakes that make touch-up look worse
This section is blunt because these are the habits that consistently sabotage a decent kit, even the best car touch up paint pen you can buy.
- Overfilling in one pass: the repair domes, then looks like a raised dot forever.
- Trying to brush metallic like house paint: metallic flakes streak and “flip” differently.
- Skipping clearcoat on a clearcoat system: color can look flat, and the fill can shrink.
- Touching the area between coats: fingerprints and texture show up fast in glossy paint.
- Chasing perfection on a daily driver: overworking leads to bigger, messier spots than the original chip.
When a paint pen isn’t enough (and what to do instead)
A pen is great for chips, okay for short defects, and usually the wrong tool for large peeling clear, cracking paint, or collision damage. Also, if the damage sits on a sharp body line, blending gets tricky because edges highlight texture.
- Large areas or multiple panels: a body shop can blend into adjacent panels so the color shift is less obvious.
- Plastic bumper gouges: may need filler, texture matching, and flexible additives.
- Rust through or bubbling: typically requires sanding back to solid material, then refinishing steps.
If you’re dealing with structural corrosion or you’re unsure about sanding through clearcoat, it’s reasonable to consult a professional refinisher. You’re not “giving up,” you’re avoiding a repair spiral that becomes more expensive.
Conclusion: picking the right pen and getting the “clean enough” win
The best car touch up paint pen in 2026 is usually the one that matches your OEM code, gives you a fine tip for chips, and includes a compatible clearcoat for modern finishes, then you back it up with careful prep and thin layers.
If you want a simple next step, find your paint code, choose a code-matched system with needle-tip control, and practice the dab method on a test surface before you touch the hood. That small pause saves most people from the “why is this so obvious?” moment.
FAQ
- How do I find the right paint code for my car?
Check the door jamb sticker, under-hood label, or your owner documentation, and confirm it against your VIN info when possible. Some colors have variants, so build date can matter. - Will a touch-up pen fix scratches that look white?
Sometimes “white” is just scuffed clearcoat and may polish out. If the scratch catches your fingernail, it’s more likely through clear and needs filling with paint and possibly clear. - Do I need clearcoat over touch-up paint?
Many factory finishes are basecoat/clearcoat, so adding clear often improves gloss and durability. On some systems or tiny chips, skipping clear can be acceptable, but the repair may look flatter. - Why does my repair look darker or lighter than the panel?
Color mismatch can come from paint fading, wrong variant, application thickness, or metallic orientation. Testing and using small dabs instead of brushing larger areas usually helps. - Can I use a “universal black” pen on my black car?
It can be passable for micro-chips, but many blacks differ in undertone and gloss. If you care about appearance up close, code-matched is a safer bet. - How long should I wait before washing the car?
Follow the product’s cure guidance. Many touch-up paints feel dry quickly but remain soft underneath; washing too soon can haze the spot or pull material at the edge. - Should I wet sand a touch-up blob flat?
You can, but it carries risk of cutting surrounding clearcoat, especially on thin modern finishes. If you’re not confident, practice first or ask a detailer/body shop for help.
If you’re trying to pick a best car touch up paint pen without wasting money on the wrong match, it often helps to start with your paint code and damage type, then choose a kit that includes the applicator style you’ll actually use, rather than paying for “all-in-one” convenience you might fight with.