
Best windshield repair kit resin choices come down to one thing most people miss: matching the resin style and injector setup to your chip, your temperature, and how “clean” the break really is.
If you have a small rock chip or short crack, a DIY resin kit can often make the damage far less visible and help slow spreading. But if you buy the wrong kit, you usually learn the hard way, the resin stays hazy, won’t pull into the legs, or cures before it fills.
This guide focuses on what actually matters in real garages and driveways: resin type (thin vs thicker), injector quality, curing method, and when a pro repair is the smarter call.
What “best” really means for windshield repair resin
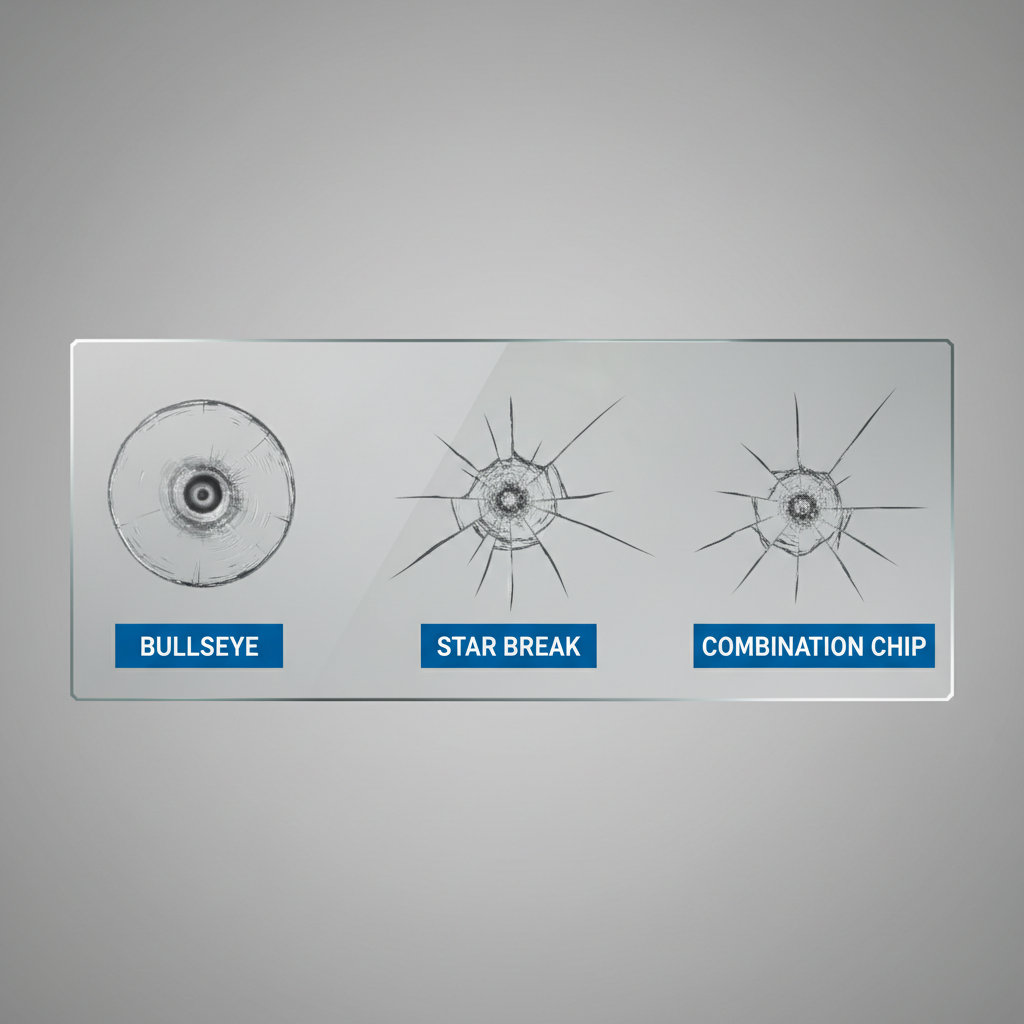
Most kits market “universal” resin, but glass damage isn’t universal. A bullseye chip behaves differently than a star break, and both behave differently at 45°F than at 95°F in direct sun.
- Clarity after cure: good resin cures clear, not milky, and doesn’t leave heavy distortion in the driver’s line of sight.
- Flow into the break: thin resin tends to penetrate tiny legs better, while thicker blends can be easier to control on some repairs.
- Working time: you want enough open time to pull air out and fill fully, especially if you’re new to injectors.
- Injector seal quality: if the bridge/injector leaks or sits crooked, even great resin struggles.
- UV curing reliability: consistent cure matters, whether you use a UV lamp or sunlight.
According to the National Highway Traffic Safety Administration (NHTSA), a damaged windshield can reduce visibility and may compromise safe driving in some situations, so if you’re unsure whether your damage is safe to DIY, it’s reasonable to consult a professional glass shop.
Quick fit check: which kit resin profile matches your damage
If you only remember one thing, remember this: resin has to reach the deepest parts of the break, not just cover the surface. Use this quick sorting list before you buy.
Usually DIY-friendly
- Small chips (often smaller than a quarter) with limited “legs”
- Bullseye or simple combination chips that aren’t contaminated
- Short cracks (some kits include crack sealer, but results vary by length and location)
Often frustrating with off-the-shelf resin kits
- Star breaks with many thin legs that need very good penetration
- Damage that sat for weeks collecting dirt, moisture, or car-wash wax
- Chips right at the edge of the windshield where stress is higher
- Damage directly in the driver’s critical viewing area where distortion is more noticeable
In many cases, the best windshield repair kit resin for star breaks is a thinner, high-penetration formula paired with a solid injector that can cycle vacuum/pressure without leaking.
Key features to compare in the best windshield repair resin kits
Brand names matter less than the system design. When people say “this kit didn’t work,” it’s often the injector, the curing setup, or the prep steps, not just the resin bottle.
1) Resin viscosity and purpose
- Penetrating (thin) resin: better at wicking into tight fractures and legs, often the safer bet for typical rock chips.
- Pit filler resin: thicker top resin used to level the surface after the break fills, helps with smooth finishing.
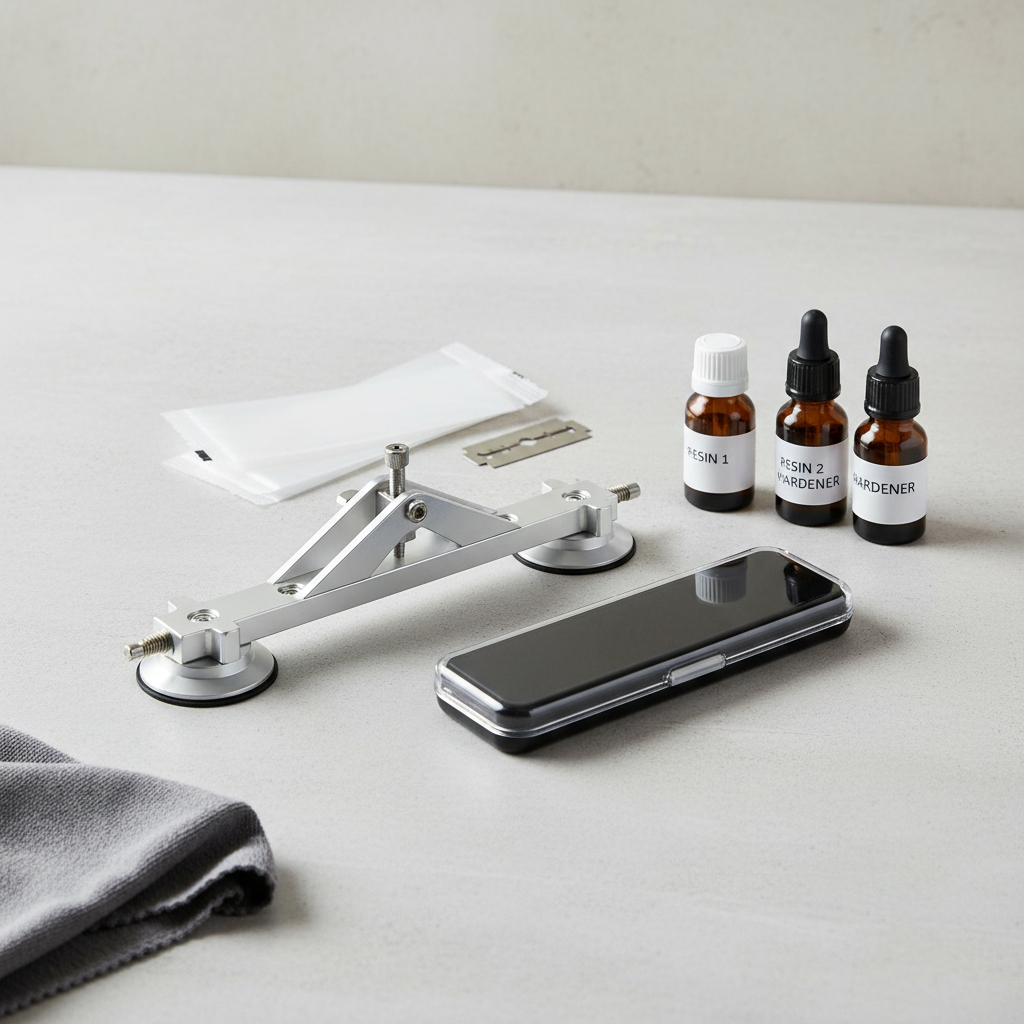
Some kits include both; others ask you to use one resin for everything. Dual-resin systems tend to be more forgiving for beginners.
2) Injector design (where most kits win or lose)
- Bridge stability: a rigid bridge keeps pressure even, so resin doesn’t drift off-center.
- Seal quality: a clean, flexible suction cup seal reduces leaks and helps pull air out.
- Pressure/vacuum cycling: better kits let you alternate pressure and vacuum, which can improve fill on complex breaks.
3) Curing method
- Sunlight cure: convenient, but heat and variable UV can shorten working time.
- UV lamp cure: more consistent when you’re working in shade or cooler weather.
If you repair indoors or in a covered lot, a kit that includes (or recommends) a UV light can reduce guesswork.
Comparing common kit “types” (with a practical table)
I can’t pick a single winner for everyone because availability and kit versions change, and results depend on damage type. What I can do is map the main kit categories so you can buy the right style fast.
| Kit type | Best for | Pros | Watch-outs |
|---|---|---|---|
| Injector/bridge kit with penetrating + pit filler | Most rock chips, small combination breaks | More control, better fill, cleaner finish | Costs more, needs careful alignment |
| Single-resin injector kit | Simple bullseye chips | Simpler steps, fewer materials | Finish can be less smooth, can struggle with legs |
| “Syringe” or basic suction kit | Very small chips, quick cosmetic improvement | Cheap, fast setup | Inconsistent pressure, higher chance of haze |
| Crack sealer / surface crack kit | Short cracks (results vary) | May slow crack spread | Often not structural, may not look great |
For most drivers, the sweet spot is an injector/bridge kit that includes both a penetrating resin and a pit filler, that’s where the best windshield repair kit resin experience usually shows up.
How to choose the right resin kit for your situation (a quick checklist)
Before you click “Buy,” run this checklist. It saves money because you stop trying to force a cheap kit to do a hard repair.
- Chip size and shape: bullseye vs star vs combination
- Location: near edge, or in driver’s line of sight
- Time since impact: fresh chips fill easier than week-old dirt-filled breaks
- Weather: cold slows flow, heat speeds cure and can trap bubbles
- Where you’ll work: shaded garage vs sunny driveway
- Your patience level: some injectors require multiple pressure/vacuum cycles
If your damage is fresh and not near the edge, a mid-range injector kit with thin resin usually delivers the best balance of fill and clarity.
Step-by-step: getting a cleaner repair with a resin kit
This is the part people rush, then blame the resin. Slow down here and most kits perform noticeably better.
Prep (where clarity starts)
- Work in stable temps when possible, mild shade helps prevent premature curing.
- Clean the area with a lint-free cloth; avoid glass cleaners with waxes or rain-repellent additives.
- Dry the break; moisture trapped inside is a common cause of haze, if you suspect moisture, warming the glass slightly may help, but avoid overheating.
Fill the break
- Mount the bridge so the injector sits centered over the impact point, crooked setup causes leaks and partial fill.
- Use the kit’s vacuum/pressure steps as directed, many breaks need multiple cycles before the legs clear.
- Watch for tiny bubbles; if they stop moving, re-center pressure or repeat a cycle instead of curing too early.
Cure and finish
- Apply curing film and cure with UV as instructed, sunlight works, but keep the area from overheating.
- Scrape level with a fresh razor at a low angle, then wipe clean.
Done right, the goal is not “invisible,” it’s stable and clearer, many repairs still show a faint mark, especially on older or complex breaks.
Common mistakes that make good resin look bad
- Curing too soon: once resin hardens, it won’t flow into unfilled legs.
- Trying to fix contaminated chips: dirt and wax block resin, sometimes you’re fighting physics.
- Working in direct hot sun: resin can thicken or start curing while you’re still cycling pressure.
- Over-tightening the injector: can distort the seal or even worsen certain breaks.
- Expecting a crack kit to be a structural fix: many DIY crack products are more “seal” than “restore.”
If you’ve tried once and the break still looks white or bubbly, switching to a best windshield repair kit resin setup with a better injector can help, but only if the chip is still clean and not already sealed with a failed cure.
When it’s smarter to stop and call a professional
DIY is appealing, but some scenarios deserve a shop visit, even if it costs more.
- Cracks that keep growing, especially near the edge
- Damage that intersects multiple fractures or looks like a “spider web” across a wider area
- Any repair that leaves distortion in the driver’s critical viewing zone
- If your vehicle has ADAS cameras behind the windshield, calibration may be a factor after replacement; a glass professional can advise for your model
According to the Auto Glass Safety Council (AGSC), proper repair and replacement practices are important for vehicle safety systems and structural performance, so if you’re unsure whether your damage is repairable, it’s reasonable to get a professional assessment.
Key takeaways + what to buy next
Most people don’t need an exotic formula, they need a kit that pulls air out, pushes resin in, and cures consistently. If your chip is fresh and fairly simple, a solid injector kit with thin penetrating resin plus pit filler is usually the safest purchase.
- Buy for your chip type, not for marketing claims.
- Prioritize injector quality, resin alone can’t fix a leaky seal.
- Control heat and UV, stable conditions improve clarity.
- Stop early if damage is complex or near the edge, a shop may save you from a full replacement later.
If you want a simple action step: identify your chip type, then choose the kit category in the table that matches it, that’s how you end up with the best windshield repair kit resin experience for your situation.
FAQ
What is the best windshield repair kit resin for star breaks?
Star breaks often need a thinner penetrating resin and an injector that can cycle pressure/vacuum without leaking. Even then, very fine legs may not fully disappear, especially if the chip is older.
Will a windshield resin kit stop a crack from spreading?
It can in some cases, especially for small, early damage, but results vary by crack length, location, and temperature swings. If the crack sits near the edge or keeps growing, a professional repair is usually safer.
Why did my repair turn cloudy after curing?
Cloudiness commonly comes from moisture, contamination, or trapped air. Working in direct sun can also shorten working time and trap bubbles before the break fills.
Is sunlight enough to cure windshield repair resin?
Often yes, but it’s inconsistent by season, shade, and glass temperature. A small UV lamp can make curing more predictable, especially in a garage or on cooler days.
Can I redo a windshield chip repair if I messed it up?
Sometimes, but once resin cures inside the break, it’s hard for new resin to penetrate. If the first attempt sealed the surface but left bubbles underneath, a glass shop may have better tools to evaluate options.
Do I need special resin for cold weather repairs?
Cold slows resin flow, so penetration becomes harder. If you must repair in cold conditions, working in a warmer space or gently warming the glass may help, but avoid aggressive heat and follow product guidance.
Is it safe to drive right after using a resin kit?
Once fully cured, many repairs are fine for normal driving, but if the crack is in a critical viewing area or appears to be spreading, it’s wise to limit driving and consult a professional.
If you’re trying to avoid buying two kits just to get one decent repair, focus on injector stability and a resin set that includes a penetrating formula plus pit filler, then practice on a small chip first before tackling anything complex.