
how to replace car windshield wiper blades beam is mostly a matter of matching the right blade to your wiper arm, choosing the correct adapter, and snapping it in without stressing the windshield or the arm spring.
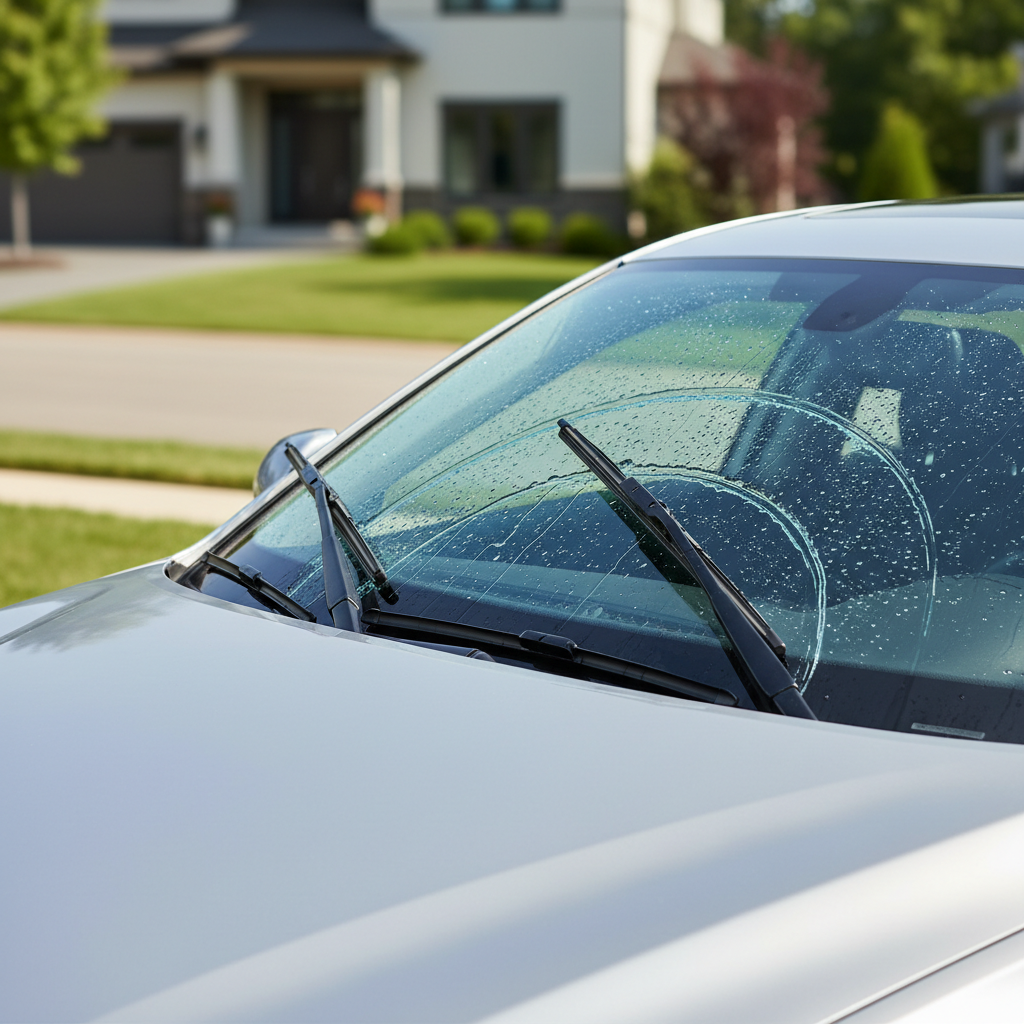
If your wipers chatter, smear, or leave a clean “triangle” you can’t ignore, it’s not just annoying, it can cut visibility right when you need it. Beam-style blades usually perform better in snow and heavy rain, but only if they’re installed correctly and sized right.
I’ll walk you through the quick checks that prevent buying the wrong blade, the common connector styles in the U.S., and a practical step-by-step replacement process you can do in a driveway or parking lot, with a few “don’t do this” reminders that save glass and money.
Before you start: confirm blade size and arm connection
Beam blades look “universal,” but the connector is where most DIY installs go sideways. Two quick confirmations keep you out of return lines.
- Blade length: Check your owner’s manual, the sticker inside the driver door, or a reputable online fit guide by vehicle year/make/model. Driver and passenger sides often differ, and the rear wiper (if any) is its own thing.
- Wiper arm type: In the U.S., many vehicles use a J-hook arm, but pin, bayonet, and side-lock connectors are common on some makes and newer models.
- Front vs. rear: Rear beam blades typically use a different mount, don’t assume the front set matches.
According to NHTSA, clear visibility is a core safety factor in preventing crashes, so if your wipers struggle in rain or snow, treating this as basic maintenance makes sense.
Quick self-check: do you really need new beam blades?
Sometimes the blade is done, sometimes the windshield just needs a deep clean. Use this quick list to decide what to do next.
- Streaks that don’t go away after cleaning the glass and running washer fluid: replacement is likely.
- Chattering or skipping: often worn rubber, but can also be a dirty windshield, wax residue, or a bent arm.
- One section never clears: beam blades can lose even pressure after heat cycles, or the arm may be slightly twisted.
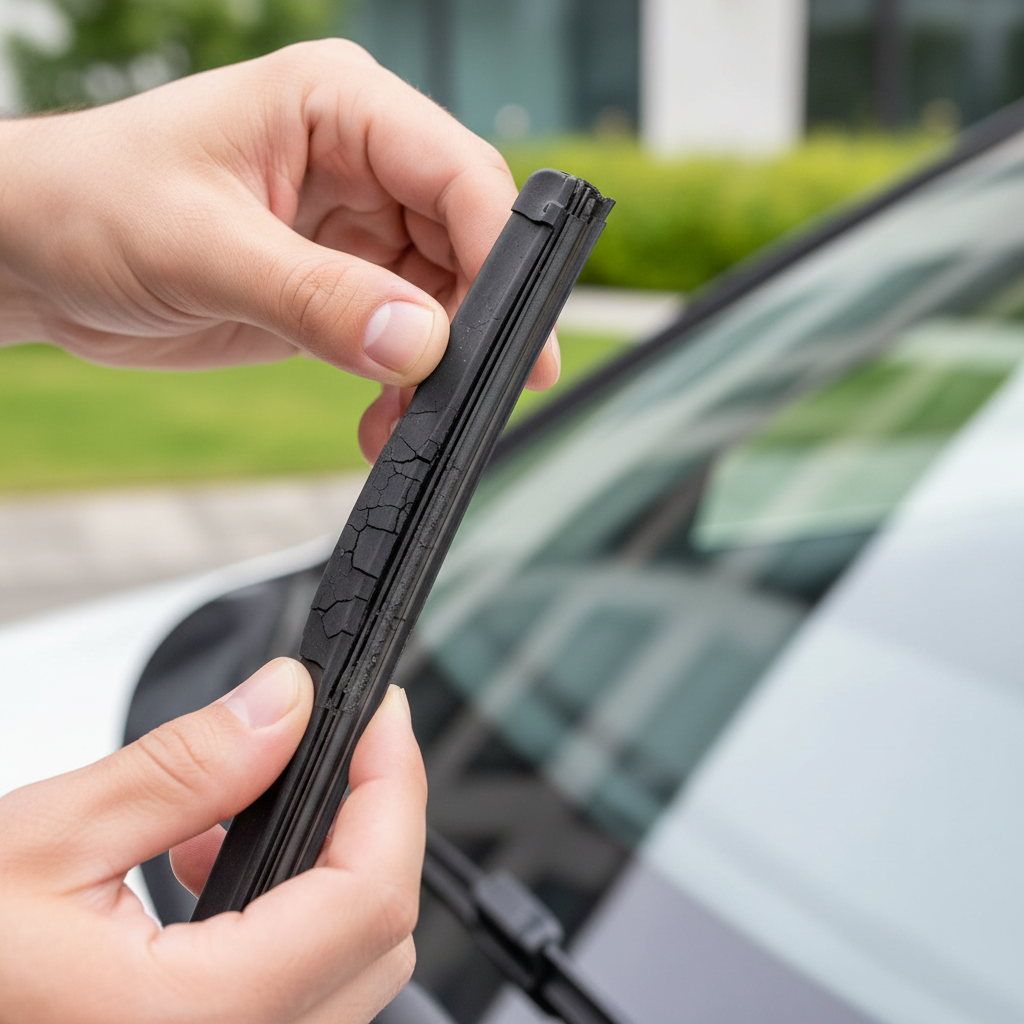
- Cracks, splits, or hard rubber: the blade is past its useful life.
- Wiping noise in light rain but okay in heavy rain: sometimes normal, but if it’s new behavior, inspect the edge closely.
If the rubber edge looks intact, try cleaning the windshield with a dedicated glass cleaner and wiping the blade edge with a damp microfiber. If it still smears, swapping the blade usually fixes it faster than chasing minor adjustments.
Tools and prep that make the job easier (and safer)
Most beam replacements require no tools, but prep matters because wiper arms are spring-loaded. If an arm snaps onto bare glass, it can crack a windshield.
- New beam blades (correct lengths, correct connector package)
- Microfiber towel or a folded shop towel to protect the windshield
- Glass cleaner (optional but recommended)
- Small flathead screwdriver (only if your connector uses a stubborn tab, and only gently)
Prep routine that avoids drama: park on level ground, turn the ignition off, lift each wiper arm carefully, then place a towel on the windshield under the arm. That towel is cheap insurance.
How to replace beam wiper blades: step-by-step (most common U.S. setups)
The exact latch varies by connector, but the flow stays consistent. If you’re unsure mid-step, stop and look for a small release tab, forcing it usually breaks the adapter.
Step 1: Put the wiper arm in a stable “service” position
Lift the arm away from the windshield until it stays up. If your vehicle has wiper service mode (common on some newer cars), use it so the arms sit where you can safely work.
Step 2: Remove the old beam blade (J-hook example)
- Rotate the blade so it’s roughly perpendicular to the arm.
- Find the small release tab or pinch points on the adapter.
- Press the tab, then slide the blade down and out of the J-hook curve.
If it feels stuck, it’s often road grit in the joint. Wiggle gently while keeping the tab pressed, don’t pry hard against the plastic.
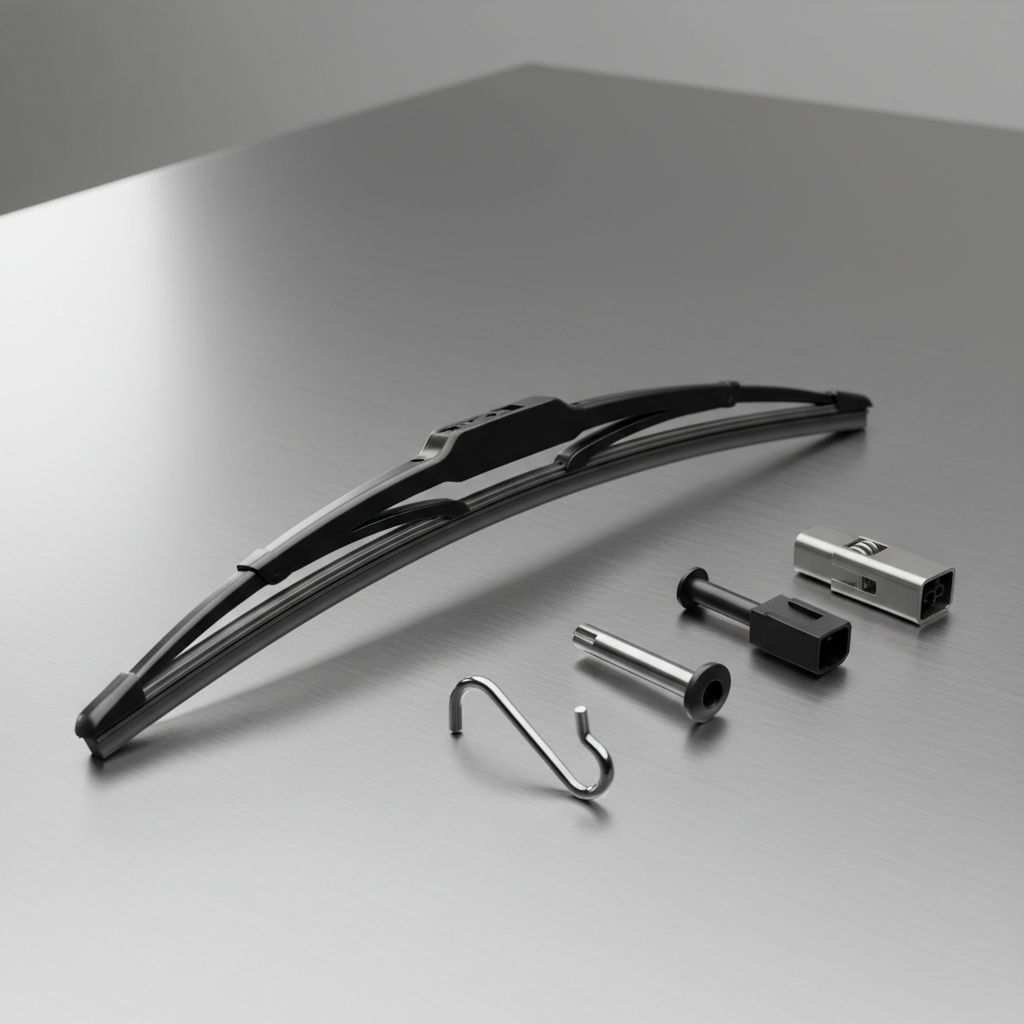
Step 3: Match the new blade adapter to your arm type
Many beam blades come with multiple adapters in the box. Choose the one that matches your wiper arm, then confirm it “clicks” into the blade body with no gaps.
- J-hook: the hook feeds into the adapter channel, then locks with a click.
- Pin: the pin slides through the adapter hole until the latch engages.
- Side lock / top lock: the arm slides in from the side or top, then a locking cap snaps shut.
Step 4: Install the new beam blade and confirm the lock
- Slide or hook the new blade into place following the arrow or molded guides on the adapter.
- Listen and feel for a positive click.
- Tug lightly on the blade to confirm it cannot slide back out.
Now lower the arm carefully back to the windshield, don’t let it drop. Repeat on the other side.
Step 5: Test wipe with washer fluid
Run washer fluid and do a few wipes at low speed. You’re looking for smooth travel, full contact across the glass, and no “flapping” at the ends.
If the blade flips or chatters immediately, it’s usually a wrong adapter, incomplete lock, or wrong length that changes pressure points.
Common connector types and what to expect (table)
If you want to move faster, identify your connector first, then follow the matching release method.
| Arm connector | How it usually releases | DIY difficulty | Common mistake |
|---|---|---|---|
| J-hook | Press tab, slide blade out of hook | Easy | Not rotating blade to the right angle |
| Pin (side/top) | Press latch, slide off pin | Medium | Forcing adapter without fully pressing latch |
| Side lock | Open/press lock cap, slide sideways | Medium | Installing backwards so it won’t click |
| Bayonet | Press spring clip, pull straight off | Medium | Prying clip until it deforms |
Practical tips that improve wipe quality right away
Replacing the blade fixes most problems, but beam blades still depend on a clean surface and a healthy wiper arm.
- Clean the windshield edges: oily film near the A-pillars and cowl can smear into the wipe path.
- Don’t touch the rubber edge with greasy fingers, oils can cause early streaking.
- Check arm tension: if one side consistently streaks after new blades, the arm spring may be weak or the arm slightly bent, many shops can check this quickly.
- Use proper washer fluid: in freezing states, seasonal fluid helps prevent icing that can tear rubber.
Key takeaway: beam blades are forgiving in bad weather, but they’re picky about correct fit and a fully seated connector.
Mistakes people make (and how to avoid them)
- Letting the arm snap onto the windshield: always hold the arm and keep a towel under it.
- Buying “close enough” sizes: an extra inch can hit trim or ride up on the glass edge, causing chatter.
- Assuming all adapters are installed from the factory: many blades ship with a default adapter that may not match your arm.
- Installing the blade upside down: some beam designs have an aerodynamic spoiler that should face a specific direction; check the markings.
- Ignoring a damaged windshield: chips and rough spots can shred new rubber faster than you expect.
When it’s worth getting professional help
Most drivers can handle this, but a few situations justify asking a shop for a quick install or inspection.
- You can’t identify the arm connector and the blade won’t latch securely after careful attempts.
- The wiper arm looks bent, hits the windshield edge, or parks in the wrong spot.
- New blades still skip badly, which can suggest arm tension issues or a mechanical problem in the linkage.
- You notice windshield damage in the wipe path; a glass professional can advise whether repair is appropriate.
If visibility is compromised, it’s usually smarter to pause DIY experimentation and get it checked, especially before long highway driving in rain.
Conclusion: a small job that pays off every time it rains
When you know your arm connector and confirm size first, how to replace car windshield wiper blades beam becomes a quick, repeatable maintenance task instead of a frustrating guessing game. Start by protecting the windshield, make sure the adapter clicks, then test with washer fluid.
If you want a simple action plan: check sizes today, replace both front blades as a pair, and clean the windshield right after install so you can judge the new wipe pattern honestly.
FAQ
How often should I replace beam wiper blades?
Many drivers replace them about once or twice a year, but climate changes everything. Intense sun, ice scraping, and road grime can shorten lifespan, so go by performance signs like streaking and chatter.
Why do my new beam blades still streak after installation?
Common causes include a dirty windshield film, incorrect adapter seating, or a bent/low-tension arm. Clean the glass thoroughly first, then re-check that the connector fully locked.
Are beam blades better than conventional frame blades?
Often, yes in snow and heavier rain because the beam design applies more even pressure. But a high-quality conventional blade can still work well, especially in mild climates and on flatter windshields.
Can I mix different brands or types on driver and passenger sides?
You can, but it’s not ideal. Different rubber compounds and spoiler shapes may wipe differently, which can feel inconsistent in heavy rain. Many people prefer matching blades for predictable performance.
What if the wiper blade won’t click into the arm?
Stop and verify the connector type and adapter choice. In many cases the wrong adapter is attached, or the blade is oriented incorrectly relative to the arm. If it still won’t latch, returning for the correct fit is safer than forcing it.
Do I need to replace both wipers at the same time?
It’s usually a good idea because both blades age under similar conditions, and mixed wear can create uneven visibility. If one blade is clearly newer and wiping clean, you can replace just the bad side, but keep an eye on the other.
Is there a right way to clean beam wiper blades?
Wipe the rubber edge with a damp microfiber and mild cleaner, then dry it. Avoid harsh solvents that can dry out rubber, and don’t use abrasive pads.
How do I know I bought the correct length?
Compare the new blade to the old one before removing packaging if possible, and confirm with your manual or a vehicle fit guide. If the new blade touches trim, overhangs noticeably, or collides during a test wipe, it’s likely the wrong size.
If you’re still stuck on connector fit, or you’d rather not guess between adapters, bring the old blade (or a photo of the arm end) when shopping, it’s the quickest way to match the right beam wiper replacement and get back to clear visibility with less hassle.